

Hello there! I'm on the road, but I have a lovely tutorial to share with you! Hope you are all well!

Y!! I LOVE THIS TIME OF YEAR!


Label Me Bold

All
images © 1990-2020 Stampin’ Up!®
Supplies:
·
Stamp Sets: Label Me Bold (151631)
·
Cardstock: Daffodil Delight (119683),
Whisper White (100730)
·
Ink: StazOn Jet Black (101406), Daffodil
Delight (147094)
·
Tools & Accessories: Stitched So
Sweetly Dies (151690), Daffodil Delight 1/4” Ruched Ribbon (151311)
·
Designer Paper: Best Dressed 6” x 6”
Designer Series Paper (151319)
·
Misc: Mini Stampin’ Dimensionals
(144108), Mini Glue Dots (103683),
Measurements:
·
Card Base: Daffodil Delight 5-1/2” x
8-1/2”, scored and folded at 4-1/4”
·
Cardstock #2: Whisper White 3” x 3”
·
Designer Paper: Best Dressed 2” x 5-1/2”
and 2-1/4” x 5”
·
Ribbon: Daffodil Delight 6-1/2” and 8”
Instructions:
·
Adhere shorter piece of Best Dressed DSP
to longer piece, overlapping 5/8” and leaving 1/4” border showing at top and
bottom.
·
With edge of 6-1/2” ribbon against the edge
of the shorter DSP, wrap ends to back and adhere. Use glue dots, if necessary,
to hold it in place on front.
·
Adhere DSP/ribbon to card base, leaving
a small border showing on the left side.
·
Tie a bow with the remaining 8” of
ribbon, trim ends, and adhere as shown with a glue dot.
·
Stamp Label Me Bold scribble image on
Whisper White using Daffodil Delight ink, then die cut with second smallest
scalloped rectangle die. Adhere to card with dimensionals.
·
Stamp greeting, trim down, and adhere to
stitched scallop rectangle with dimensionals.
Thanks BUNCHE for stopping by today! Hope Thursday treats you right!
Stay SAFE & WELL!!!
SALE-A-BRATION is ENDING SOON!! For EVERY $50 you spend (before tax and shipping) you can choose a FREE item from the SALE-A-BRATION Brochure!!
Here's what you'll get only from me, with a $50 order
(before tax & shipping)
and
Use the March Hostess Code!

You'll receive the following...
- One Darla Daisy for every $50 spent (before
tax &shipping ). When you have 10 Darla Daisies you can choose $40.00 of Stampin' Up! product(s) of your choice from me! Justemail me your choice! - The projects we make in my March classes! Here's what were making this month!

You'll also receive this months gift when you spend a minimum of $50
(before tax & shipping)!
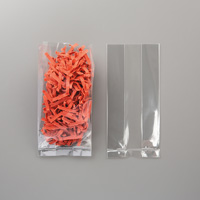 |
| 3 x 6 Gusseted Cellophane Bag (A $5.00 Value) |
- REMEMBER...use the March hostess code JAD9JGZY and place a minimum order of $50 (before tax and shipping) and you'll get goodies from me!! These will be mailed separately the first week of April.
~Today's Thought~


No comments:
Post a Comment
Thank you for your comments....they are always such an encouragement!