

Hello Everyone! I hope you all are well and finding things to keep you busy during our Shelter In Place time! Have you discovered anything about yourself during this time? I hope you're staying strong and enjoying time with family! If you live alone...a SPECIAL HELLO to you all! I'm sure you're missing your time with others. Praying you are all SAFE and WELL!!
It's Monday and I have THREE fun "Make-It Monday Tutorials to share with you today! Each one uses the Graces Garden Bundle! I hope they give you INSPIRATION to create today!


Y!! I LOVE THIS TIME OF YEAR!


It's Monday and I have THREE fun "Make-It Monday Tutorials to share with you today! Each one uses the Graces Garden Bundle! I hope they give you INSPIRATION to create today!
"Make-It Monday" - Grace’s Garden

All
images © 1990-2020 Stampin’ Up!®
Supplies:
·
Stamp Sets: Grace’s Garden (15113),
Bundle (153789)
·
Cardstock: Pool Party (122924), Whisper
White (100730), Garden Green (102584)
·
Ink: Tuxedo Black Memento (132708), Poppy
Parade Dark Stampin’ Blends Marker (146879), Daffodil Delight Dark Stampin’ Blends
Marker (144585), Granny Apple Green Dark Stampin’ Blends Marker (146877), Smoky
Slate Stampin’ Blends Makers Combo Pack (145058), Soft Suede Stampin’ Blends
Markers Combo Pack (147273)
·
Tools & Accessories: Garden Gateway
Dies (151512), Stampin’ Dimensionals (100430), Paper Snips 103579)
·
Designer Paper: Botanical Prints Product
Medley (151301)
Measurements:
·
Card Base: Pool Party 8-1/2” x 5-1/2”.
Score and fold at 4-1/4”.
·
Designer Paper #1: Botanical Prints
Designer Paper 5-1/4” x 4”.
Instructions:
·
Gate Hole: Using the designer paper
layer, cut the gate hole using the die about 1-1/4” from the left side and ¼”
from the bottom. Glue to card front centered.
·
Gate: Cut Whisper White Cardstock using
the gate die. Using Paper Snips, cut in the center of both gates to free them
so they swing open. Glue gate over the gate hole.
·
Sentiment: Stamp the sentiment on the
Pool Party Cardstock layer, inside the gate using Tuxedo Black Memento Ink.
·
Flowers: Stamp all of the flower images
with Tuxedo Black Memento Ink and color with the Stampin’ Blends Markers. I
stamped (1) vine, (2) of the large flower and (3) of the smaller flower. I also
used the branch die and cut (3) using Garden Green Cardstock.
·
Cut one of the largest flower in half
vertically to glue inside each side of the gate. Glue the vine to the gate
frame. Glue all other flowers to card front using Stampin’ Dimensionals. Glue
the Garden Green Cardstock branches tucked under the flowers.
·
Animals: Stamp the cat and bird images
using Tuxedo Black Memento Ink and color both with Stampin’ Blends. Glue both
animals to each gate as shown in the photo.
"Make-It Monday" - Grace’s Garden

All
images © 1990-2020 Stampin’ Up!®
Supplies:
·
Stamp Sets: Grace’s Garden (151513)
·
Cardstock: Very Vanilla Thick (144237), Very
Vanilla (101650), Balmy Blue (146982)
·
Ink: Memento (132708), Sahara Sand
(147117), Smoky Slate (147113), Gray Granite (147118)
·
Markers: Subtles Stampin’ Write Markers
(147156) –Balmy Blue, 2018-2020 In Color Stampin’ Write Markers (147159) –Call
Me Clover
·
Tools & Accessories: Garden Gateway
Dies (151512), Rectangle Stitched Framelits (148551), Pinewood Planks 3D
Embossing Folder (152320), Noble Peacock Rhinestones (149494), Stamping Sponges
(141337),Stampin’ Dimensionals (104430), SNAIL (104332), Bone Folder (102300)
·
Designer Paper: Perennial Essence
(149100)
·
Tape for masking stamp
Measurements:
·
Card Base: Very Vanilla Thick 8-1/2” x
5-1/2”. Score and fold at 4-1/4”
·
Cardstock #2: Balmy Blue 4” x 5-1/4”
·
Cardstock #3: Very Vanilla 3-3/4” x 5”,
scrap
·
Designer Paper: 3-3/4” x 5”
Instructions:
·
Glue Balmy Blue to card base, then glue
DSP to Balmy Blue.
·
Stamp vine in Memento two times on each
side of Very Vanilla CS
·
Using sponges, sponge and pounce the
following inks to create a stucco effect: Sahara Sand, Smoky Slate, and Gray Granite
·
Die cut opening
·
Color leaves and flowers with markers,
then adhere to DSP with Stampin’ Dimensionals
·
Using piece from die cut out from
sponged Very Vanilla, stamp part of saying for “sign” using the masking technique.
Then trim to measure 1-3/4” x 1-1/4 and emboss with Pinewood Planks folder,
sponge edges and adhere to top of card
·
On scrap Very Vanilla CS stamp rest of
saying with Memento ink using the same masking technique.
·
Die cut saying with Rectangle Stitched
Framelits and glue to DSP with SNAIL
·
Add Noble Rhinestones
Masking Technique:
Use Scotch tape or Washi tape to cover the part of the stamp that you do
not want to ink. Remember to remove tape before stamping on cardstock.
"Make-It Monday" - Grace’s Garden

All
images © 1990-2020 Stampin’ Up!®
Supplies:
·
Stamp Sets: Grace's Garden stamp set
(151513) or Bundle [153789]
·
Cardstock: Rococo Rose 8-1/2" X
11" Cardstock [150882]
·
Pressed Petals Specialty Designer Series
Paper [149500]
·
Tools & Accessories: Garden Gateway
Dies (151512)
·
Inks: Early Espresso Classic Stampin'
Pad [147114], Rococo Rose Classic
Stampin’ Pad [150080], Mossy Meadow Classic Stampin' Pad [147111]
Measurements:
- Rococo
Rose Card Base: 4-1/4”x 5-1/2”
·
Pressed Petals Designer Series Paper 4”x
5-1/4”
Instructions:
·
Stamp the flowers on the Rococo Rose
card stock with the Early Espresso ink pad.
·
Die-Cut with the Garden Gateway Dies.
·
Die-Cut the gate in the Pressed Petals
Designer Series Paper.
·
Turn the inner ‘door’ piece around and
adhere to the inside of the ‘gate’ with SNAIL adhesive.
·
Adhesive the Scripted Pressed Petals
paper with SNAIL adhesive.
·
Adhere the Door and gate with the Mini Stampin’
Dimensionals.
·
Color in the flowers with the Wink of
Stella glimmer brush and the Rococo Rose ink pad and Mossy Meadow ink pad.
·
Stamp the inside of the card with Early
Espresso ink and the Grace’s Garden greeting.
Thank you so much for stopping by today! HAVE A WONDERFUL DAY!
SALE-A-BRATION is ENDING TOMORROW!! For EVERY $50 you spend (before tax and shipping) you can choose a FREE item from the SALE-A-BRATION Brochure!!
Here's what you'll get only from me, with a $50 order
(before tax & shipping)
and
Use the March Hostess Code!

You'll receive the following...
- One Darla Daisy for every $50 spent (before
tax &shipping ). When you have 10 Darla Daisies you can choose $40.00 of Stampin' Up! product(s) of your choice from me! Justemail me your choice! - The projects we make in my March classes! Here's what were making this month!

You'll also receive this months gift when you spend a minimum of $50
(before tax & shipping)!
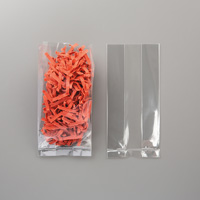 |
| 3 x 6 Gusseted Cellophane Bag (A $5.00 Value) |
- REMEMBER...use the March hostess code JAD9JGZY and place a minimum order of $50 (before tax and shipping) and you'll get goodies from me!! These will be mailed separately the first week of April.
~Today's Thought~


No comments:
Post a Comment
Thank you for your comments....they are always such an encouragement!