Darla Daisies Loyalty Program & Tracking Form

Darla Hutt-Watson

My photo
Weaverville, CA, United States
Hi there! I'm Darla and I live in BEAUTIFUL Northern California! I am a mother of seven terrific kids and have been married to my husband for 32 years. I have been a Stampin' Up Demonstrator since 2010 and love ALL THINGS paper crafting. I also have a scrapbooking retreat business called Scrap Happens Retreats. I love teaching and learning new techniques, sharing ideas, hosting my retreats, being a wife and a mom. Hiking, bicycling, gardening and cooking are a few of my other hobbies. I'm living for Jesus and LOVIN' LIFE!!

Tuesday, September 29, 2020

PPP Blog Hop - Hello Pumpkin

Hello everyone and welcome to this evenings Paper Pumpkin Possibilities Blog Hop!  Oh my goodness, this kit is AMAZING!  I didn't want to stop creating!  There are SO MANY POSSIBILITIES!  

Tonight, I'll share just a few!!


This gift card holder was really easy!  I just cut one of the treat boxes in half (in the landscape position), folded it up part way and attached the sides at the very edges.  It holds a gift card PERFECTLY!

SAVE THOSE DIAMONDS....


This cute treat holder holds SEVEN chocolate kisses!  I just folded it into a triangle!


Here's why you wanted to save those diamonds!  Doesn't it make a CUTE card?  I used the Note Cards and Envelopes for this card.  So easy and CUTE!!!


Again with those diamonds...I created this card!  I love how it turned out!  

See...I told you this was a GREAT kit!


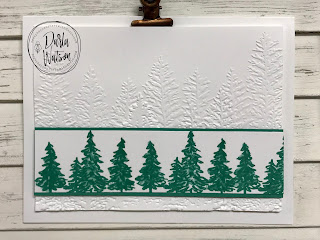
Last...I wanted to share what the kit is actually intended to create!  There are SO MANY parts to this Paper Pumpkin that you can make MANY MANY other things....there are lots of options for cards and tags too!


Thank you so much for hopping along with us tonight!  I hope you have been INSPIRED!  Up next is Lisa over at Queen B Creations!  I know you'll LOVE what she's created!!


Have you subscribed to Paper Pumpkin yet?  
Do you have a demonstrator? 

Click HERE to shop now!  
I'd love to be your demonstrator!

Are yo interested in becoming a Stampin' Up Demonstrator?  

Click HERE to join my team!

If you said no to these questions...I'd love for you to choose me as your demonstrator or join my team!

Here's this month's HOSTESS CODE!!


Use this months hostess code to receive this months gift
from me with a $50 order (before tax & shipping)!


If your order is over $150.00 please DO NOT use the hostess code...it is still a qualifying order but you will get the hostess credit for yourself!


You'll also earn Darla Daisies through my loyalty program!
One daisy for every $50 spent (before tax & shipping)!

  • One Darla Daisy for every $50 spent (before taxshipping).  When you have 10 Darla Daisies you can choose $40.00 worth of  Stampin' Up! product(s) of your choice from me! Get your tracking form at the top this blog by clicking on Darla Daisy Loyalty Program.  When you have 10 daisies, email, call or text email me your choice!!

~Today's Thought~


Tuesday's Tip - FUN FOLD with Artistry Blooms Designer Paper

Hello everyone! It's Tuesday and I have a really FUN FOLD video to share with you today!  

(If you just pop in once a day for inspiration....try to pop back in this evening.  It's time for another Paper Pumkin Possibilities Blog Hop).  This kit is AMAZING!!

ENJOY my Tuesday's Tip!


Here's the finished card AND a birthday card I made with the same fold!


Start with a 4 1/4" x 11" piece of Night of Navy cardstock. Score it at 4 1/4" and 8 1/2".

Choose the shape you want to cut out from the top and follow the directions on the video!  This is a really fun, fast and simple card to create!  I hope you'll give it a try!


Isn't this a great masculine birthday card?  There are so many options with this fold!  I'm thinking heart shape....tree shape...oh and so much more!  

I can't wait to play some more!


Do you NEED any of today's supplies? 


Click HERE to shop now!  
I'd love to be your demonstrator!


Use this months hostess code to receive this months gift
from me with a $50 order (before tax & shipping)!


If your order is over $150.00 please DO NOT use the hostess code...it is still a qualifying order but you will get the hostess credit for yourself!


You'll also earn Darla Daisies through my loyalty program!
One daisy for every $50 spent (before tax & shipping)!

  • One Darla Daisy for every $50 spent (before taxshipping).  When you have 10 Darla Daisies you can choose $40.00 worth of  Stampin' Up! product(s) of your choice from me! Get your tracking form at the top this blog by clicking on Darla Daisy Loyalty Program.  When you have 10 daisies, email, call or text email me your choice!!

~Today's Thought~


Friday, September 25, 2020

Cherish the Season

Good morning everyone! Hope you are all well!  Are you ready for your weekend?  I AM!!!

I was typing up a tutorial for a group that I belong to this morning and thought...why not share this on my blog today!  I think is such a beautiful card!  I LOVE the new Brushed Metallic cardstock!  This simple card showcases it so well!

Cherish the Season

All images © 1990-2020 Stampin’ Up!®


Supplies:

·         Stamp Sets – Cherish the Season (153417); Bundle (155154)

·         Card Stock -  Very Vanilla (101650); Gold Brushed Metallic (153524)

·         Stamp Pads – VersaMark (102283)

·         Tools – Sounds of the Season Dies (154043); Bundle (155154)

·         Misc. -  Gold Cards & Envelopes (153532); Forever Greenery Trim Ribbon Combo Pack (152475); Gold Stampin’ Emboss Powder (109129); Gold Glitter Enamel Dots (152155); Stampin’ Dimensionals (104430); Stampin’ Seal (152813); Heat Tool (129053)


Measurements: 

·         Very Vanilla – 3 ½” X 4 ¾”


Instructions:

1.    Cut bell from Gold Brushed Metallic cardstock and attach to Very Vanilla cardstock with Stampin’ Dimensionals and Stampin’ Seal adhesive.

2.    Using three strands of gold trim from the Forever Greenery Trim Ribbon Pack, tie a bow through the tops of two bells.

3.    Stamp the Merry Christmas sentiment with VersaMark then heat emboss with Gold Stampin’ Emboss Powder and Heat Tool.

4.    Attach Gold Glitter Enamel Dots.

5.    Attach Very Vanilla cardstock to card base from the Gold Cards & Envelopes pack.


Do you NEED any of today's supplies? 


Click HERE to shop now!  
I'd love to be your demonstrator!


Use this months hostess code to receive this months gift
from me with a $50 order (before tax & shipping)!


If your order is over $150.00 please DO NOT use the hostess code...it is still a qualifying order but you will get the hostess credit for yourself!


You'll also earn Darla Daisies through my loyalty program!
One daisy for every $50 spent (before tax & shipping)!

  • One Darla Daisy for every $50 spent (before taxshipping).  When you have 10 Darla Daisies you can choose $40.00 worth of  Stampin' Up! product(s) of your choice from me! Get your tracking form at the top this blog by clicking on Darla Daisy Loyalty Program.  When you have 10 daisies, email, call or text email me your choice!!

~Today's Thought~


Thursday, September 24, 2020

In the Pines

Hello everyone!! Oh my goodness we woke up to blue skies today and I am so thankful!  The smoke from the many surrounding fires has been horrible.  It's a bit windy which is a concern but I'm LOVING the blue skies for now and not worrying!!  Here's my house and the view from the backyard.  Isn't it BEAUTIFUL!?!?  We haven't seen the mountains surrounding us for weeks!  


I have a fun project I want to share with you today!  We made this card in my September classes.  It's so easy to make and so pretty too!  I'm giving tutorials out at my classes now...I hope you enjoy this one!

In the Pines

All images © 1990-2020 Stampin’ Up!®


Supplies:

·         Stamp Sets – In the Pines (153448)

·         Card Stock - Whisper White (100730); Just Jade (153079)

·         Stamp Pads – Just Jade (153115)

·         Tools - Paper Trimmer (152392)

·         Misc. -  Evergreen Forest Embossing Folder (153576) Stampin’ Dimensionals (104430); Stampin’ Seal (152813)


Measurements

·         Whisper White - 5 ½” x 8 ½” scored at 4 ¼”; 3 ¾” x 5” and  1 ¼”  x 5”

·         Just Jade – 1 3/8” x 5”


Instructions:

1.    Emboss 3 ¾” x 5” piece of Whisper White cardstock using the Evergreen Forest embossing folder. Attach to card base with Stampin’ Dimensionals.

2.    Stamp trees onto the 1” x 5” piece of Whisper White cardstock using the In the Pines stamp set and Just Jade ink.

3.    Attach stamped image to 1 1/8” x 5 1/8” piece of Just Jade cardstock with Stampin’ Seal adhesive.  Then attach to embossed image on card base with Stampin’ Dimensionals.


Do you NEED any of today's supplies? 


Click HERE to shop now!  
I'd love to be your demonstrator!


Use this months hostess code to receive this months gift
from me with a $50 order (before tax & shipping)!


If your order is over $150.00 please DO NOT use the hostess code...it is still a qualifying order but you will get the hostess credit for yourself!


You'll also earn Darla Daisies through my loyalty program!
One daisy for every $50 spent (before tax & shipping)!

  • One Darla Daisy for every $50 spent (before taxshipping).  When you have 10 Darla Daisies you can choose $40.00 worth of  Stampin' Up! product(s) of your choice from me! Get your tracking form at the top this blog by clicking on Darla Daisy Loyalty Program.  When you have 10 daisies, email, call or text email me your choice!!

~Today's Thought~


Wednesday, September 23, 2020

24 Hour SALE!!!

 Today's the day!  TODAY ONLY!!! Don't miss it!


Click HERE to shop now!  
I'd love to be your demonstrator!


Use this months hostess code to receive this months gift
from me with a $50 order (before tax & shipping)!


If your order is over $150.00 please DO NOT use the hostess code...it is still a qualifying order but you will get the hostess credit for yourself!


You'll also earn Darla Daisies through my loyalty program!
One daisy for every $50 spent (before tax & shipping)!

  • One Darla Daisy for every $50 spent (before taxshipping).  When you have 10 Darla Daisies you can choose $40.00 worth of  Stampin' Up! product(s) of your choice from me! Get your tracking form at the top this blog by clicking on Darla Daisy Loyalty Program.  When you have 10 daisies, email, call or text email me your choice!!

~Today's Thought~


Monday, September 21, 2020

"Make-It Monday" Banner Year

 Hello everyone!  I hope you had a wonderful weekend and are all safe and healthy.  Did you find any time for creating?  My weekend was filled with kids and it was terrific!  Ever since I started watching Blue Bloods on Friday nights it has been my hope to someday have Sunday night dinners! I'm excited to say that it has been happening regularly since April.  This weekend I had a Saturday night AND a Sunday night family dinner...WHAT A TREAT!  I am so thankful for this blessing!

Well...it's Monday and I have another "Make-It Monday" Tutorial for you today! ENJOY the INSPIRATION!


Banner Year 


All images © 1990-2020 Stampin’ Up!®


Supplies:

·         Stamp Sets:  Banner Year (#153464)

·         Cardstock:  Early Espresso (#119686) Mossy Meadow (#133676), Very Vanilla (#101650)

·         Ink:  Mossy Meadow (#147111), Pumpkin Pie (147086)

·         Tools & Accessories:  Stitched Rectangles Dies (#151820), Many Medallions (#153584), Pumpkin Pie Blends (Dark) (#154897), Faux Suede Trim (#152472), Flowers for Every Season Gems (#153645)

·         Misc:  Stampin’ Seal (#152813). Stampin’ Dimensionals (#104430), Adhesive Sheets (#152334), Multipurpose Liquid Glue (#110755); Post-It Notes


Measurements: 

·         Card Base:          Early Espresso - 5 ½” x 8 ½”, scored at 4 ¼”

·         Cardstock #2:      Very Vanilla – 4” x 5 ¼” (inside of card), 2 ¾” x 4” (die cut)

·         Cardstock #3:      Mossy Meadow – 4 ¼” x 5 ½” (die cut); 1” x 5 ¼” (inside of card)


Instructions:

·         Apply adhesive sheet to the back of the 4 ¼” x 5 ½” piece of Mossy Meadow.  Cut out with die cut.  Attach to card front.

·         Die cut 2 ¾” x 4” Very Vanilla with Stitched Rectangle.

·         Stamp “Happy fall, y’all!” using Mossy Meadow ink at the bottom of the stitched rectangle.

·         Stamp the pumpkin twice on a Post It Note and cut out to create two masks.

·         Stamp the pumpkin four times in Pumpkin Pie ink across the stitched rectangle leaving room between them and the sentiment for the ribbon.

·         Place the two masks on two of the stamped pumpkins and stamp one on top of them to create the illusion they are stacked.  Repeat with two more pumpkins.

·         Stamp the stalk & leaf using Mossy Meadow ink on each of the pumpkins.

·         Color two of the gems using the Dark Pumpkin Pie Blends marker.  Determine where you want to place them and using the fine end of the blends marker, create a small circle.  Put a drop of Multipurpose Liquid Glue over the colored spots and adhere the gems.  (Coloring the paper will make the gems appear darker than just coloring the gems.

·         Wrap the ribbon around the stitched rectangle.  Attach to card front using Dimensionals..


·         Inside of Card: (Not pictured)

·         Apply adhesive sheet to the back of the 1” x 5 ¼” piece of Mossy Meadow.  Cut out with the largest border die cut.  Attach to Very Vanilla 4” x 5 ¼” piece and attach to inside of card.

·         You are Done!

Do you NEED any of today's supplies? 

   
Click HERE to shop now!  
I'd love to be your demonstrator!


Use this months hostess code to receive this months gift
from me with a $50 order (before tax & shipping)!


If your order is over $150.00 please DO NOT use the hostess code...it is still a qualifying order but you will get the hostess credit for yourself!


You'll also earn Darla Daisies through my loyalty program!
One daisy for every $50 spent (before tax & shipping)!

  • One Darla Daisy for every $50 spent (before taxshipping).  When you have 10 Darla Daisies you can choose $40.00 worth of  Stampin' Up! product(s) of your choice from me! Get your tracking form at the top this blog by clicking on Darla Daisy Loyalty Program.  When you have 10 daisies, email, call or text email me your choice!!

~Today's Thought~


3D Thursday - Country Birdhouse Treat/Gift Holder

Hello everyone!  Happy Thursday!  I'm so glad you stopped by for today's 3D Thursday Project! I am the designer this week and I crea...