


Hello There! Welcome to this evenings Paper Pumpkin Possibilities Blog Hop and THANK YOU for hopping along with us! The March kit is TERRIFIC and you're gonna LOVE all of the inspiration!

I have two project to share with you tonight! One is a simple card and the other is a SUPER FUN 3-dimensional creation! I had a lot of fun creating with this set! This just might be a FAVORITE kit!

My FAVORITE project is my 3D creation! I used the enclosed acrylic block to make this cute framed art. First I cut one of the cards in half, put the block on top of it and traced around it with a pencil. I cut it out and stamped the sentiment with Memento Black ink. Next, I attached it to the back of the acrylic block attaching it with glue dots, placing them strategically behind the rain boots and grass. Next I attached the rain boots with dimensionals. I colored a piece of Whisper White Crinkled Seam Binding with a Dark So Saffron Stampin' Blend Marker. I also colored a couple of threads of White Flax Ribbon with the same marker. I slipped both ribbons and a piece of the twine that is in the kit underneath the boots, wrapping them around the block and tying them into bows. Last, I added a few raindrops just above the boots! I gave it as a gift to my husband today and he LOVED it!

My second project was created with the left over piece of card that I cut for the background of my block. I stamped the grass with Garden Green ink, mounted it onto a piece of Whisper White cardstock then onto a piece of Coastal Cabana. I attached it to a Whisper White Note Card with dimensionals. Last, I attached the rain boots (these cute boots are in the kit!), with dimensionals and tied a bow on one boot with Whisper White Crinkled Seam Binding. SUPER CUTE and SIMPLE!!
I hope you enjoyed my creations and that you'll be inspired by those to follow! Click below to hop along with us! Next up is

Now is a GREAT time to subscribe to Paper Pumpkin.
Next month's kit has a GREAT theme!
For Those You Love the MOST - My WONDERFUL Family!

If you don't already subscribe, don't have a demonstrator and want to start receiving these fabulous kits, click on the photo below, subscribe and choose me (Darla Hutt-Watson) as your demonstrator!! Today, March 31st, is the last day to get SAB rewards...get them with a Paper Pumpkin Prepaid Subscription!

SALE-A-BRATION ENDS TODAY!!!
For EVERY $50 you spend (before tax and shipping) you can choose a FREE item from the SALE-A-BRATION Brochure!!
Here's what you'll get only from me, with a $50 order
(before tax & shipping)
and
Use the March Hostess Code!

You'll receive the following...
- One Darla Daisy for every $50 spent (before
tax &shipping ). When you have 10 Darla Daisies you can choose $40.00 of Stampin' Up! product(s) of your choice from me! Justemail me your choice! - The projects we make in my March classes! Here's what were making this month!

You'll also receive this months gift when you spend a minimum of $50
(before tax & shipping)!
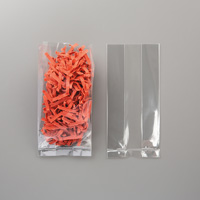 |
| 3 x 6 Gusseted Cellophane Bag (A $5.00 Value) |
- REMEMBER...use the March hostess code JAD9JGZY and place a minimum order of $50 (before tax and shipping) and you'll get goodies from me!! These will be mailed separately the first week of April.
~Today's Thought~


