Darla Daisies Loyalty Program & Tracking Form

Darla Hutt-Watson

My photo
Weaverville, CA, United States
Hi there! I'm Darla and I live in BEAUTIFUL Northern California! I am a mother of seven terrific kids and have been married to my husband for 36 years. I have been a Stampin' Up Demonstrator since 2010 and love ALL THINGS paper crafting. I also have a scrapbooking retreat business called Scrap Happens Retreats. I love teaching and learning new techniques, sharing ideas, hosting my retreats, being a wife and a mom. Hiking, bicycling, gardening and cooking are a few of my other hobbies. I'm living for Jesus and LOVIN' LIFE!!

Wednesday, December 4, 2019

12 Weeks of Stampin' Up! Christmas - Bells are Ringing ... Week Ten

Good Morning and WELCOME to Wednesday and my blog!  It's time for another 12 Weeks of Stampin' Up! Christmas project!  Can you believe it's already week 10?  YIKES...I haven't made my cards OR started shopping!  I better get busy!

Bells are Ringing
All images © 1990-2019 Stampin’ Up!®


Supplies:
•      Bells are Ringing Bundle- (153024)
•      Cardstock – Real Red (102482); Whisper White (100730); Shaded Spruce (146981); Gold Foil (132622)
•      Stamp Pads – Memento (132708)
•      Misc. – Merry Christmas dies (147912); Beautiful Boughs dies (150661); Holiday Rhinestone Basic Jewels (150457); Winter Knit 3D Embossing Folder (150645); Stampin’ Dimensionals (104430); Multipurpose Liquid Glue (110755); SNAIL Adhesive (104332); Shaded Spruce/Gold Striped Ribbon (149597)
Measurements: 
•      Real Red Cardstock: 5 ½” x 8 ½” and scrap
•      Whisper White: 5 ¼ " x 4"
•      Scrap of Shaded Spruce              
Instructions:
•      Fold the Real Red in half at 4 ¼.
•      Run the whisper white cardstock thru your embossing machine with the Winter Knit 3D embossing folder. Wrap with ribbon around the middle and tie in knot. Adhere to real red base with Dimensionals or your favorite adhesive.
•      Run the Bell thru die cutting machine with real red and the top layer with the gold foil adhere together with liquid glue. Run the real red again with the Happy Holidays, Run the shaded spruce piece with the bough die. Adhere all to the whisper white layer as shown.
•      On another scrap of Real Red and stamp the ribbon with the Memento and cut out with the coordinating die.
•      Adhere the paper ribbon to the top of the bell and put a yellow rhinestone on top of the ribbon.
•      Take a small piece of gold foil and run that thru the die cutting machine with one of the bell dies that has the 3 stars on it. That is where you will get the stars to adhere to your card.

Thank you so much for stopping by today!  I'm part of a blog hop tonight at 6:00pm PST...I hope you come back for MORE INSPIRATIONS!!

Here's what's happening with Scrap Happens Here this month!  


Please use this months Hostess Code!
(ONLY if your order is less than $150.00)

REMEMBER...use December's hostess code 
96BQ2Y4K 
and place a minimum order of $50 (before tax and shipping) and you'll get goodies from me!! These will be mailed separately the first week of January! 

You'll receive the following...
  • One Darla Daisy for every $50 spent (before tax& shipping).  When you have 10 Darla Daisies you can choose $40.00 of Stampin' Up! product(s) of your choice from me! Just email me your choice!
  • The projects we make in my December classes!  Here's what were making this month! 

You'll also receive this months gift when you spend a minimum of $50  (before tax & shipping)!

    Snowfall Accent Puff Paint
    (a $4.50 value)

    ~Today's Thought~
    Ann Voskamp Christmas Quotes | Ultimately, I land on Make Room for me and Born is the King for my ...

Monday, December 2, 2019

"Make-It Monday" Christmas Crowd

Good Morning everyone! I hope you had a TERRIFIC Thanksgiving!  Mine really nice.  It's always wonderful to have the kids who can make it home for the holidays! I LOVE having my family around!


Here were are...Monday again!  Are you ready for your week?  Have you started your Christmas shopping?  YIKES...I haven't!  I did just create some gift certificates for husbands wanting to spoil their wives with Stampin' Up! paper crafting supplies.  I haven't even made my Christmas cards yet...but it always gets done!  Well...one year I sent Valentines Day cards!

Well...it's MONDAY...and that means it's time for a "Make-It Monday" Tutorial!  I hope you're inspired to create!!
Christmas Crowd


All images © 1990-2019 Stampin’ Up!®


Supplies:
●     Stamp Sets: Christmas Crowd (150497)
●     Cardstock:  Coastal Cabana (131297), Real Red (102482), Whisper White (100730)
●     Ink: Tuxedo Black Memento Ink (132708)
●     Tool & Accessories: Stampin’ Blends; Dk Real Red (147934), Lt Bermuda Bay (144580), Lt Pool Party (144595), Dk Pool Party (144594), Dk Melon Mambo (147944), Dk Pumpkin Pie (144577), Dk Crumb Cake (144581), Lt Smoky Slate (145054), Dk Petal Pink (146871), Bronze (144607), Ivory (144606)
●     Designer Paper: Let It Snow Specialty Designer Series Paper (150393)
●     Misc: Snail Adhesive (104332)
           
Measurements: 
●     Card Base: 4 ¼” x 11”, scored at  2 ¾” and 5 ½”
●     Real Red: 3 ¾” x 4 ¾”
●     Whisper White: 3 ½” x 4 ½” and 4” x 5 ¼”
●     DSP: 2 ½” x 4” and 1” x 4”


Instructions:

●       Fold Coastal Cabana cardbase on score lines to make a “Z”


●       Adhere larger DSP piece to left side of cardbase
●       Stamp image and verse with Black Memento Ink onto smaller Whisper White piece
●       Color with Stampin’ Blends and adhere to Rea Red layer
●       Place adhesive to left side only of Real Red and adhere to DSP (if you cover entire back with adhesive it will stick to inside of card!
●       Adhere larger Whisper White to right side of card


●       Stamp verse with Memento Black
●       Adhere small piece of DSP to right side of Whisper White
●       Enjoy!

I don't have all my gift and project details ready to post yet, but I will have them tomorrow!

Thanks BUNCHES for stopping by!  Have a FANTASTIC day!

~Today's Thought~


Thursday, November 28, 2019

Wednesday, November 27, 2019

12 Weeks of Stampin’ Up! Christmas - Tags, Tags, Tags...Week Nine

Hello everyone!  It’s WEEK NINE of 12 Weeks of Christmas - Stampin’ Up!!  I hope it gets you’re creative juices flowing!

Tags, Tags, Tags…

All images © 1990-2019 Stampin’ Up!®

Supplies: 
• Stamp Sets – Tags, Tags, Tags Bundle (153042)
• Card Stock – Whisper White (100730)
• Stamp Pads – Versa Mark (102283)
• Misc. –Gold Stampin’ Emboss Powder (107129); Gold Glimmer Paper (146958); Whisper White Bakers Twine (124262); Wrapped In Plaid Designer Series Paper (149596); Cherry Cobbler and Shaded Spruce Stampin’ Markers (147155 - This is for the full set of Regals Stampin’ Write Markers); Take Your Pick Tool (144107); Heat Tool (129053); Embossing Buddy (103083); Multipurpose Liquid Glue (110755); Die Cutting Machine
​
Measurements:  
• Whisper White Cardstock: approx. 3” x 5” (These measurements don’t matter if you are making a bunch of tags)
• Gold Glimmer Paper: Scrap for snowflakes (Die measures 1 ½” x ¾” and cuts 2 snowflakes)
• Wrapped in Plaid Designer Series Paper: 1 ¼” x 2 ½” of various patterns 
​
Instructions :
1. Use your Embossing Buddy on the piece of Whisper White cardstock and then stamp the Christmas trio of stamps using Versa Mark ink.
2. Sprinkle Gold Stampin’ Emboss Powder on the image, tap off excess then heat emboss with your Heat Tool. 
3. Die cut using the Trio of Tags Die. 
4. Die cut the snowflakes using the die for the desired number of snowflakes you need for your tags. Assuming you are making a bunch for gifts.  HERE’S A TRICK: Getting a good cut using the Gold Glimmer Paper can be tricky in your die cutting machine. Try putting the Glimmer Paper face down and use the die on the back and it should cut through very nice. I also peeled the backing off the Glimmer Paper after die cutting to make adhering to my tags easier. 
5. Dress up your tags: Add a snowflake to the center of the Season’s Greetings tag with liquid glue, color the elf tag with Cherry Cobbler and Shaded Spruce markers, and color the birds with Cherry Cobbler marker on the Merry tag. 
6. Each tag is layered on top of a 1 ¼” x 2 ½” piece of designer paper. I used the Take Your Pick Tool to pierce a hole in the designer paper to match the hole in the tag then I threaded the baker’s twine through with my Take Your Pick Tool as well. 
7. I flagged the designer paper on two of the tags at one end and both ends on the last one. The tags are not glued to the designer paper. They are only held on with the baker’s twine and move freely back and forth.
8. I also added a Gold Glimmer snowflake to two of the tags on the designer paper as shown under the tags. When they move back and forth you can see the snowflake peeking through. 

Thanks for stopping by!  Have a GREAT rest of your day!!!

Here's what's happening with Scrap Happens Here this month!  THANKS so much for stopping by!  ENJOY the rest of your day!

Please use this months Hostess Code!
(ONLY if your order is less than $150.00)

REMEMBER...use November's hostess code SZCYEYZP and place a minimum order of $50 (before tax and shipping) and you'll get goodies from me!! These will be mailed separately the first week of December! 

You'll receive the following...
  • One Darla Daisy for every $50 spent (before tax& shipping).  When you have 10 Darla Daisies you can choose $40.00 of Stampin' Up! product(s) of your choice from me! Just email me your choice!
  • The projects we make in my November classes!  Here's what were making this month! 

You'll also receive this months gift when you spend a minimum of $50  (before tax & shipping)!

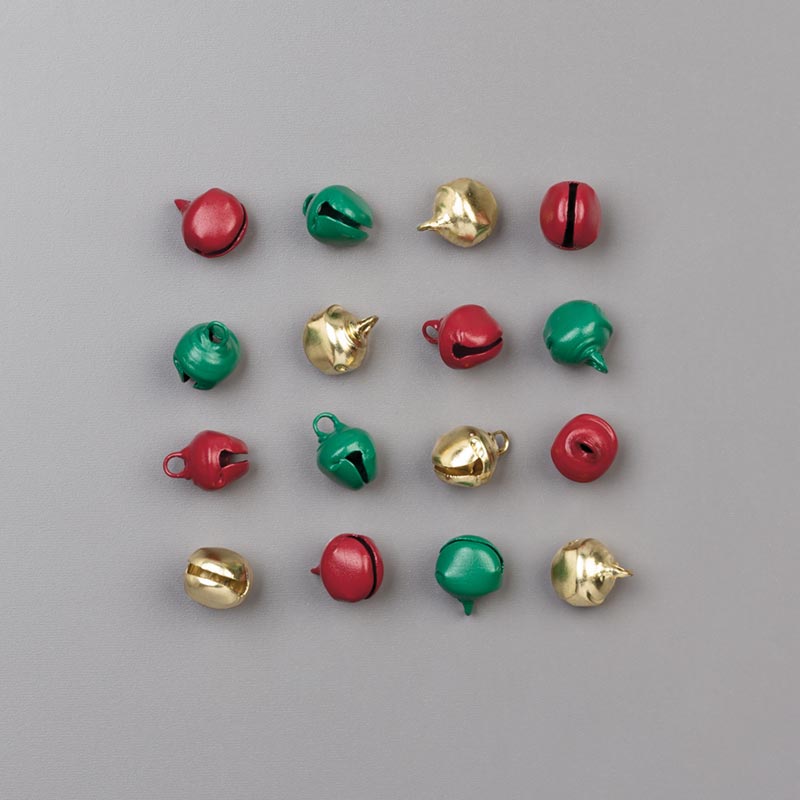
JINGLE BELLS
    Jingle Bells
    (an $5.00 value)
~Today's Thought~

Tuesday, November 26, 2019

November Paper Pumpkin Possibilities Blog Hop


Hello Every and WELCOME to the November Paper Pumpkin Possibilities Blog Hop!  This months kit is FABULOUS!!! I hope you hop along with us because you're gonna find lots of GREAT INSPIRATION!!!

I decided to use my kit to create home decor gifts for the holidays!  Once I started, I couldn't quit!  My mind was overloaded with ideas...but after FIVE projects...I decided I had to take a break and start getting ready for my December classes!

Here goes...I hope you enjoy my creations!!

My first idea was to make a banner with the tags.  I used the Hand Lettered Prose dies to cut the "J" and the "Y" from Sparkle Glimmer paper.  The "O" is created by stacking a couple of snowflakes that are include in the kit!

This cute frame is from IKEA.  It is a frame for two photos and sells for $1.00...what and AFFORDABLE project this would be for a gift or class!  I cut the star with the Stitched Stars Dies and the background designer paper is from the Let It Snow paper pack.

This fun project is an 8" x 8" shadow box. The background is an 8" x 8" piece of  Mossy Meadow cardstock with a 6" x 6" piece of Christmastime is Here Specialty Designer Paper.  The Pool Party background is two tags cut down to 2" x 4" and put together.  I LOVE this designer paper so much!!

My next shadow box has an 8" x 8" piece of Let It Snow designer paper as it's background.  All of the other supplies are from the November Paper Pumpkin kit except the rhinestones.  Isn't is FABULOUS?  It's really a GREAT kit!

My last project just might be my favorite!  I used the Woodland Embossing Folder to emboss and ink a 6" x 6" piece of  Thick Whisper White cardstock then mounted it onto a 8" x 8" piece of Whisper White cardstock.  The snow is cut by hand, using the Sparkle Glimmer paper and I added a cute little Jingle Bell to the Reindeer!


Click NEXT below to HOP on over to Dana's Blog -The Stampin' Chic 
There's so much more INSPIRATION!!!

Don't miss out on next months Paper Pumpkin Kit...sign up by December 10th to get yours!


If you don't have a demonstrator you can order directly through my store here on my blog by clicking on SHOP NOW!  You can also go directly to https://www.paperpumpkin.com/ and choose me as your demonstrator!

THANKS BUNCHES FOR STOPPING BY TONIGHT AND HOPPING ALONG WITH US!!! I love sharing what I do with YOU!!

Here's what's happening with Scrap Happens Here this month!  THANKS so much for stopping by!  ENJOY the rest of your day!

Please use this months Hostess Code!
(ONLY if your order is less than $150.00)

REMEMBER...use November's hostess code SZCYEYZP and place a minimum order of $50 (before tax and shipping) and you'll get goodies from me!! These will be mailed separately the first week of December! 

You'll receive the following...
  • One Darla Daisy for every $50 spent (before tax& shipping).  When you have 10 Darla Daisies you can choose $40.00 of Stampin' Up! product(s) of your choice from me! Just email me your choice!
  • The projects we make in my November classes!  Here's what were making this month! 

You'll also receive this months gift when you spend a minimum of $50  (before tax & shipping)!

JINGLE BELLS
    Jingle Bells
    (an $5.00 value)
~Today's Thought~
Tips on how to carve time out of your busy schedule to indulge in your creative side; you have the potential quote


Tuesday's Tip - Box in a Bag

Hello Everyone!  You're gonna LOVE this project!  It's so FUN, CUTE and EASY!!! I hope you'll give it a try!


I posted these bags last Wednesday as one of my 12 Weeks of Stampin' Up! Christmas projects with the intent to do a Facebook Live video to show how they are made!  FLOP...DISASTER...oh my...I was sideways, upside down and not there at all!  It's such a fun project that I had to do a Tuesday's Tip video showing you all how it's done this week!  I'll try again another day to do a FB Live...but for now...I hope you ENJOYED this weeks Tuesday's Tip!

Hey...I'm participating in the Paper Pumpkins Possibilities Blog Hop tonight and I have some REALLY GREAT projects to share with you!  I hope you'll drop back by at 6:00 (PST) tonight for lots of INSPIRATION!  It's a FANTASTIC kit!!

Here's what's happening with Scrap Happens Here this month!  THANKS so much for stopping by!  ENJOY the rest of your day!

Please use this months Hostess Code!
(ONLY if your order is less than $150.00)

REMEMBER...use November's hostess code SZCYEYZP and place a minimum order of $50 (before tax and shipping) and you'll get goodies from me!! These will be mailed separately the first week of December! 

You'll receive the following...
  • One Darla Daisy for every $50 spent (before tax& shipping).  When you have 10 Darla Daisies you can choose $40.00 of Stampin' Up! product(s) of your choice from me! Just email me your choice!
  • The projects we make in my November classes!  Here's what were making this month! 

You'll also receive this months gift when you spend a minimum of $50  (before tax & shipping)!

JINGLE BELLS
    Jingle Bells
    (an $5.00 value)
~Today's Thought~
65 Best Funny Quotes Life And Funny Sayings 45

Mojo Monday -

Hello and HAPPY MONDAY! Thanks, BUNCHES for stopping by today!  I hope you had a TERRIFIC weekend and found some time to create!  I'm he...