Darla Daisies Loyalty Program & Tracking Form

Darla Hutt-Watson

My photo
Weaverville, CA, United States
Hi there! I'm Darla and I live in BEAUTIFUL Northern California! I am a mother of seven terrific kids and have been married to my husband for 36 years. I have been a Stampin' Up Demonstrator since 2010 and love ALL THINGS paper crafting. I also have a scrapbooking retreat business called Scrap Happens Retreats. I love teaching and learning new techniques, sharing ideas, hosting my retreats, being a wife and a mom. Hiking, bicycling, gardening and cooking are a few of my other hobbies. I'm living for Jesus and LOVIN' LIFE!!
Showing posts with label homemade. Show all posts

Wednesday, July 8, 2020

Prized Peony Tutorials

Hello everyone!  Gosh, I had fun rafting the river yesterday!  I love where I live and am so grateful for all the outdoor activities we can do!  It turned out to be a great day...not too cold...not to hot!  We saw some really cute turtles!  I had a blast!

Hey...I have some really great tutorials for using the NEW Prized Peony stamp set! Peonies are one of my FAVORITE flowers!  I wished they lasted through the summer! I hope these cards INSPIRE you!

 Peony Hello

All images © 1990-2020 Stampin’ Up!®
Supplies:
  • Bundle/Stamps:  Prized Peony Bundle [154056] , Forever Fern Cling Stamp Set [152559]
  • Ink: Magenta Madness Pad [153117] , Just Jade Pad [153115] , Gray Granite Pad [147118] , Magenta Madness Stampin' Blends Combo Pack [153106] , Just Jade Stampin' Blends Combo Pack [153107]
  • Paper:  Peony Garden Designer Series Paper [152483] , Magenta Madness 8-1/2" X 11" Cardstock [153080] , Just Jade 8-1/2" X 11" Cardstock [153079], Whisper White 8-1/2" X 11" Cardstock [100730]
  • Misc: Layering Circles Dies [151770] , Stitched Shapes Dies [152323]

Measurements: 
  • Magenta Madness  CS: 4 ¼ x 11”
  • Whisper White CS: 3 ¼ x 3 ¼ for circle, scrap for greeting, 2 strips 1 x 5”
  • Just Jade: 3 ¼ x 3 ¼ for circle, scrap for greeting
  • DSP 2  x 5”; 

Instructions:
1.    Stamp large flower randomly on Magenta Madness card front folded in half in magenta Madness ink. Set aside.
2.    Make a banner edge on one side of the DSP. Dies cut 2 borders from whisper white strips using peony dies. Adhere them to sides of the DSP. Adhere to the middle of the card.
3.    Die cut largest stitched circle from whisper white and corresponding scalloped circle from Just Jade. Stamp same flower on white circle using Gray Granit ink. Color flower with Magenta Madness and Just Jade blends. Adhere to Just Jade scalloped circle. Add with dimensionals to the card.
Stamp “Hello” in Just Jade ink on scrap of whisper white, die cut with corresponding circle. Die cut slightly bigger scalloped circle from Just Jade scrap. Adhere both circles together. Add to the card with dimensional.

 Prized Peony
All images © 1990-2020 Stampin’ Up!®

Supplies:
·         Stamp Sets –  Prized Peony Bundle  (154056)
·         Card Stock – Gray Granite Cardstock (146983) Whisper White (100730)
·         Stamp Pads – Gray Granite Ink Pad (147118)
·         Misc. – Peony Garden Desginer Paper (152483) Very Vanilla Scalloped Lace (149583) Gray Granite Blends Combo Back (149537) Foam Adhesive Sheets (152815) Elegant Faceted gems (152464) Tasteful Textures 3D Embossing Folder (152718)


Measurements:  
·         Whisper White cardstock                                            8.5” x 5.5”
·         Gray Granite cardstock                                               4” x 5.25
·         Whisper White cardstock                                            3.75” x 5”
·         Prized Peony designer paper                                     3.5” x 4.75”
·         Whisper White Cardstock for flower                           4” x 5”    

              
Instructions:
1.    Use the Gray Granite Blends to colors the very vanilla ribbon – set aside to dry while you prepare the rest of the card
2.    Score and fold the Whisper White Cardstock in half to form card base
3.    Texturize the 4” x 5.25” piece of Gray Granite with the Tasteful Textures 3D embossing folder
4.    Adhere the texturized Gray Granite Piece to your card front
5.    Stamp the image with Gray Granite Ink and adhere to a foam sheet
6.    Die cut flower (The foam sheets die cut easily creating a customized adhesive backing for the peony)
7.    Wrap a length of the stained Gray Granite lace across the Peony Garden Designer Paper securing to the back side.
8.    Peel Packing from foam adhesive and adhere flower to Peony Carden Designer paper.
9.    Adhere the flower layer to the 3.75” piece of Whisper White Cardstock and adhere this to the texturized Gray Granite layer on your card front.
10. Create a bow with additional stained Gray Granite lace and secure to flowe
11. Add Elegant faceted gems
12. OPTIONAL – add greeting of choice to card front
13. Add greeting and message to inside of card. 


Prized Peony
All images © 1990-2020 Stampin’ Up!®

Supplies:
·         Stamp Sets – Prized Peony (152504); Bundle Prized Peony stamp set with Peony Dies (154056)
·         Card Stock – Thick Whisper White (140272); Whisper White (100730); Gray Granite (146983); Petal Pink (153620)
·         Stamp Pads – Gray Granite (147118)
·         Misc. – Peony Garden Designer Series Paper (DSP) (152483); Peony Dies (152701); Rectangle Stitched Dies (148551); Wink of Stella Glitter Brush (141897); Flowers for Every Season Ribbon Combo Pack (153620); Elegant Faceted Gems (152464); Mini Glue Dots (103683); Stampin’ SEAL (152813); Stampin’ Dimensionals (104430);
           
Measurements:  
·         Card Stock 1: Thick Whisper White          8 1/2” x 5 1/2”
·         Card Stock 2: Whisper White         a quarter of a sheet of cardstock to die cut or 4 ¾” x 3 3/8” to layer without stitched edge.  
·         Card Stock 3: Gray Granite            4 ½” x 3 1/8” plus scrap for scalloped die cut (4” x 1”)
·         Card Stock 4: Petal Pink     2 ½” x ¾”
·         DSP: Peony Garden Designer Series Paper      4 3/8” x 3”                  
           
Instructions:
1.    Score and fold Thick Whisper White card base at 4 ¼”. Set aside.
2.    Die cut Whisper White cardstock with 4 ¾” x 3 3/8” size Stitched Rectangle Die. OR just use a piece of 4 ¾” x 3 3/8” cardstock.
3.    Die cut the scalloped edge using the Peony Dies with Gray Granite cardstock. Finished length is 4 ½”. Attach that scalloped piece to the back of the stitched rectangle using SEAL and add to the front of your card.
4.    Stamp the flower on to the Designer Series Paper and attach it to the Gray Granite cardstock layer using Stampin’ SEAL. Add that whole layer to the card front using Stampin’ Dimensionals.
5.    Stamp the sentiment on Petal Pink Cardstock and flag the right side using your paper snips.
6.    Cut a 1” piece of ribbon and fold it in half and attach it to the back side of the sentiment on the left side using Min Glue Dots. Add Stampin’ Dimensionals to the back of the sentiment and attach to the front of the card as shown.
7.    Add 3 Elegant Faceted Gems to the card and Wink of Stella to the dark stamped parts of the flower.


Need any of today's supplies? 


Click HERE to shop now!  
I'd love to be your demonstrator!

Thanks so much for stopping by today! 
Have a WONDERFUL day and HAVE FUN CREATING!!!

Take care...stay WELL!

I'm having TWO (2) specials this month and
 Stampin' Up! is having one too!
 
From Stampin' Up! you'll receive a $5 coupon code for every $50 (before tax & shipping) you spend.  Coupon Code will be emailed to you and must be used August 4th - 31st!

 
From me with a $50 order (before tax & shipping)!

Square Vellum Doilies


From me, the first 25 with a $150+ order 
(before tax & shipping)!

You'll earn both gifts

If your order is over $150.00 please DO NOT use the hostess code...it is still a qualifying order but you will get the hostess credit for yourself!


You'll also get Darla Daisies!
One daisy for every $50 spent (before tax & shipping)!

  • One Darla Daisy for every $50 spent (before tax& shipping).  When you have 10 Darla Daisies you can choose $40.00 worth of  Stampin' Up! product(s) of your choice from me! Get your tracking form at the top this blog by clicking on Darla Daisy Loyalty Program.  When you have 10 daisies, email, call or text email me your choice!!

~Today's Thought~
Wherever life plants you, bloom with grace #frenchproverb   #peonies #bloom  #quotes #quoteoftheday #positivity #wordsofwisdom #inspiring #motivation #femininity

Monday, June 29, 2020

"Make-It Monday" - Boho Indigo Project Medley

Hello Everyone!  I hope you are all well! Have you been getting any creating time?  I went to a paper crafting retreat with some girlfriends this past weekend and it was WONDERFUL.  It was so relaxing, full of laughter and nice and cool!  It was on the coast of Northern California and it was 40 degrees cooler over there.  I'm not a fan of over 100 degrees, so it was a PERFECT time to get a way! 

It's Monday again and I have a new "Make-It Monday" tutorial for you! I created it with the Boho Indigo Product Medley.  I LOVE everything about these products!!  I hope you ENJOY and are INSPIRED by this tutorial!!


"Make-It Monday" Boho Indigo
All images © 1990-2020 Stampin’ Up!®

Supplies:
·         Stamp Sets – Boho Indigo Product Medley (153132)
·         Card Stock – Very Vanilla (101650); Night of Navy (100867); Soft Sea Foam (146988)
·         Stamp Pads – Night of Navy Classic Stamp Pad (147110)
·         Misc. – Stitched So Sweetly Dies (151690); Mango Melody Combo Pack Stampin’ Blend (147945); Tear and Tape Adhesive (138995); Stampin’ Dimensionals (104430); Mini Stampin’ Dimensionals (144108); Stampin’ Seal (152813); Very Vanilla Medium Envelopes (107300)
           
Measurements: 
·         Very Vanilla: 8 ½” x 5 ½” scored at 4 ¼”
           
Instructions:

1.    Using the Stitched So Sweetly Dies, cut the largest scalloped rectangle using Night of Navy cardstock. Using the same dies cut the next size down from Very Vanilla cardstock and the next size down from Boho Indigo designer series paper.
2.    Using the Boho Indigo Dies to cut vase from a contrasting piece of Boho Indigo dsp.
3.    Stamp sentiment on the bottom of the card base using Night of Navy ink.
4.    Adhere the Very Vanilla layer to the Night of Navy layer with Stampin’ Dimensionals and the dsp layer to the Very Vanilla layer with Stampin’ Seal adhesive.
5.    Using Tear & Tape, attach the Boho Indigo ribbon around all three layers, tying it in a knot and fraying the ends. Add it to the card base with Stampin’ Dimensionals.
6.    Cut on sprig from Soft Sea Foam cardstock using the Boho Indigo dies and attach to dsp with Stampin’ Seal adhesive.
7.    Attach vase over ribbon and sprig with Stampin’ Dimensionals.
8.    Color flowers (from the Boho Indigo Product Medley) with the dark Mango Melody Stampin’ Blend and attach at the top of the vase with Mini Stampin’ Dimensionals.
9.    Add a scrap piece of dsp to the flap of the envelope with Stampin’ Seal adhesive, trim and mail your card!


Need any of today's supplies? 
Click HERE to shop now!  
I'd be thrilled to be your demonstrator!

Thanks so much for stopping by today! 
I hope you're enjoying the NEW Catalog!
Have a WONDERFUL day and HAVE FUN CREATING!!!

Take care...stay WELL!

Here's what's I have for my customers who spend $50 (before tax & shipping) this month AND use June's Hostess Code!

If your order is over $150.00 please DO NOT use the hostess code...it is still a qualifying order but you will get the hostess credit for yourself!


You'll also get the things below with your $50 order 
(before tax & shipping)!

  • One Darla Daisy for every $50 spent (before tax& shipping).  When you have 10 Darla Daisies you can choose $40.00 worth of  Stampin' Up! product(s) of your choice from me! Get your tracking form at the top this blog by clicking on Darla Daisy Loyalty Program.  When you have 10 daisies, email, call or text email me your choice!!
  • Class Projects
  • This months gift!

Champagne Rhinestones a $6.00 value
~Today's Thought~
Authenticity Quote by Simon Sinek

Friday, February 21, 2020

Happy Birthday to You & the NEW Birthday Dies!

Hello there!  HAPPY Friday! Last night my daughter and I, with a couple of her friends, went down to Redding to watch our varsity girls basketball play in there first playoff game.  They won and it was a great game, but it was a bit hard to go...it felt like I was missing something.  I was, it was Adam...he should have been there cheering his friends on too.  I'm going to a Grief Share class with my husband and it talks about ambushes...that  was definitely an ambush...tears flowed.  Today, is a beautiful day though.  Skies are blue and the sun is out in my little mountain town. I love it, but I'm also praying for more snow and rain.  We are way below average and it always makes for fire worries.  Until the rain come though...I will enjoy the sunshine!

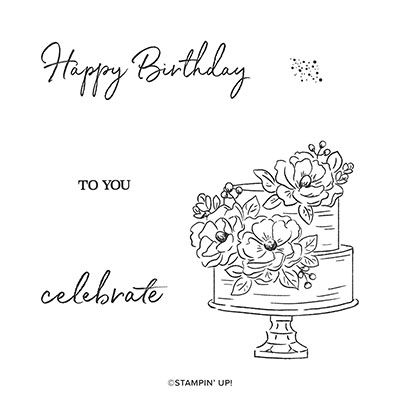
Today's card is made with the Happy Birthday to You stamp set and I absolutely LOVE IT!  This simple and pretty card is easy to make...here's how! 

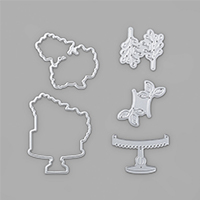
The card base is 5 1/2" x 8 1/2" and is scored at 4 1/4".  The Petal Pink layer is 4" x 5 1/4" and has Happy Birthday stamped in the lower left corner with Gray Granite ink.  The cake is also stamped with Gray Granite in and cut out with the NEW Birthday Dies.  I used Petal Pink ink and a dauber to add color to the flowers and colred theleaves with a Light Old Olive Stampin Blends Marker.  I finished the card up by adding some white twine (stripped from Whisper Whited Flax Ribbon) and a few Basic Pearl Jewels.  The cake is attache with dimensionals!  Isn't it pretty?!?!

HAPPY BIRTHDAY TO YOU CLING STAMP SET (ENGLISH)
Item # 152308 FREE with a $50 purchase (before tax & shipping)

BIRTHDAY DIES
Item # 153590 $27.00 

THANKS BUNCHES for stopping by today!!!  Have a FUN Friday and a TERRIFIC weekend!  I hope you put aside some time to create!!  Thanks for letting me share what I love to do with you!!

Scroll down to see what's happening this month at Scrap Happens Here with Darla!!

FIRST...it's SALE-A-BRATION and for EVERY $50 you spend (before tax and shipping) you can choose a FREE item from the SALE-A-BRATION Brochure!!  

YAY!!! I LOVE THIS TIME OF YEAR!!

Here's what you'll get only from me, with a $50 order 
(before tax & shipping)
and
Use February's Hostess Code!


You'll receive the following...
  • One Darla Daisy for every $50 spent (before tax& shipping).  When you have 10 Darla Daisies you can choose $40.00 of Stampin' Up! product(s) of your choice from me! Just email me your choice!
  • The projects we make in my February classes!  Here's what were making this month!

You'll also receive this months gift when you spend a minimum of $50  
(before tax & shipping)!


    Basic Pattern Decorative Masks
    (a $6.00 Value)
    REMEMBER...use February's hostess code PMTHTMD9 and place a minimum order of $50 (before tax and shipping) and you'll get goodies from me!! These will be mailed separately the first week of February!
~Today's Thought~

Mojo Monday -

Hello and HAPPY MONDAY! Thanks, BUNCHES for stopping by today!  I hope you had a TERRIFIC weekend and found some time to create!  I'm he...