Darla Daisies Loyalty Program & Tracking Form

Darla Hutt-Watson

My photo
Weaverville, CA, United States
Hi there! I'm Darla and I live in BEAUTIFUL Northern California! I am a mother of seven terrific kids and have been married to my husband for 36 years. I have been a Stampin' Up Demonstrator since 2010 and love ALL THINGS paper crafting. I also have a scrapbooking retreat business called Scrap Happens Retreats. I love teaching and learning new techniques, sharing ideas, hosting my retreats, being a wife and a mom. Hiking, bicycling, gardening and cooking are a few of my other hobbies. I'm living for Jesus and LOVIN' LIFE!!
Showing posts with label Copper Embossing Powder. Show all posts

Monday, November 18, 2019

"Make-It Monday" Tidings All Around

Hello everyone!  How's your Monday going?  I have a dentist appointment this morning...glad that's done!  I hope you had a WONDERFUL weekend!

It's Monday...and I have a lovely "Make-It Monday" tutorial to share with you!  Be INSPIRED!


Make-It Monday: Tidings All Around card created using Stampin' Up! products
All images © 1990-2019 Stampin’ Up!® 

Supplies: 
  • Tidings All Around Bundle 152371
  • Whisper White Thick card stock 140272
  • Whisper White regular card stock 100730
  • Mercury Glass Designer Acetate 150441
  • Copper Foil Sheets 142020
  • Copper Embossing Powder 141636
  • VersaMark ink pad  102283
  • Heat Tool 129053
  • Multipurpose Liquid Glue 110755
Measurements:
  • Thick Whisper White Card Base Score @ 4-1/4”, Cut at 5-1/2”
  • Mercury Glass Designer Acetate 4”x 5-1/4”
  • Whisper White 3-3/4”x 5”
Instructions:
  • Die-Cut the All-Around Wreath Die in the center of the Mercury Glass
  • Die-Cut the Same in Copper Foil.
  • Adhere the two layers of wreaths together with the Multipurpose Liquid Glue.
  • Stamp the greeting from the Tidings All Around stamp set in VersaMark ink, cover with Copper Powder and heat set with the Heat Tool
  • Adhere the Mercury Glass (that you had die-cut) to the card front and the heat embossed paper to the front of this with the Multipurpose Liquid Adhesive.
  • Adhere the layered Wreath to the card front with the same adhesive.
Isn't this a beautiful card?  I just LOVE it!

Thank you so much for stopping by today!  ENJOY the rest of your day and have a FANTASTIC week!

Here's what's happening with Scrap Happens Here this month!  THANKS so much for stopping by!  ENJOY the rest of your day!

Please use this months Hostess Code!
(ONLY if your order is less than $150.00)

REMEMBER...use November's hostess code SZCYEYZP and place a minimum order of $50 (before tax and shipping) and you'll get goodies from me!! These will be mailed separately the first week of December! 

You'll receive the following...

  • One Darla Daisy for every $50 spent (before taxshipping).  When you have 10 Darla Daisies you can choose $40.00 of Stampin' Up! product(s) of your choice from me! Just email me your choice!
  • The projects we make in my November classes!  Here's what were making this month! 

You'll also receive this months gift when you spend a minimum of $50  (before tax & shipping)!

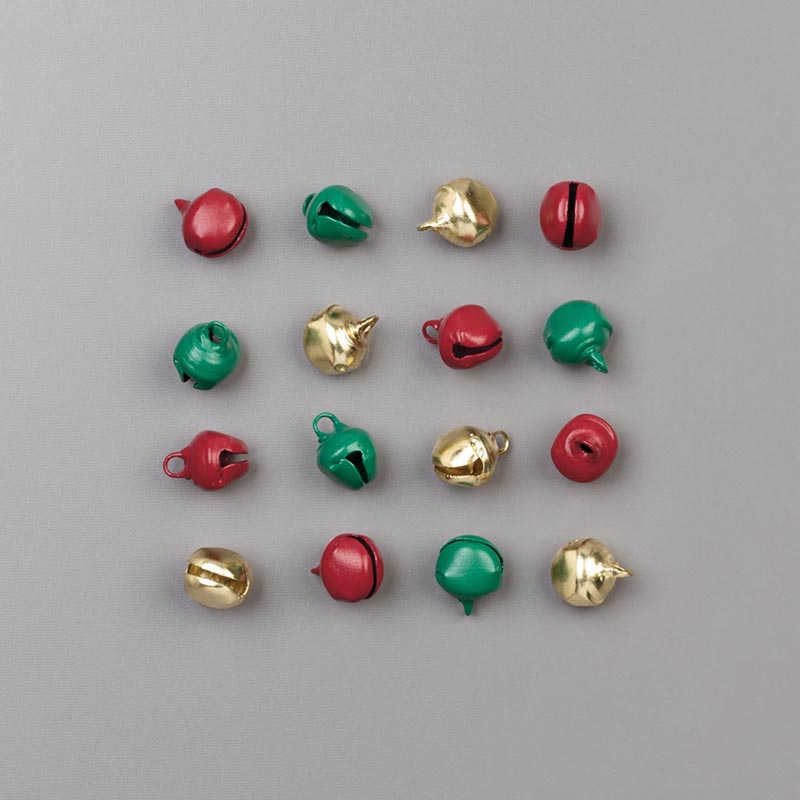
JINGLE BELLS
    Jingle Bells
    (an $5.00 value)
~Today's Thought~


Monday, November 4, 2019

"Make-It Monday" Christmas Gleaming Gift Card Holder

Good Morning everyone!  Happy Monday!  Are you ready for your week?  I'm ready...or at least I keep telling myself I am!  I hope you had a wonderful weekend!  

 It was just Kate and me...she had lots of cupcakes to bake...11 DOZEN and 4 DOZEN frosted sugar cookies!  She absolutely amazes me!  She made Red Velvet, Pina Colada, Chocolate, Vanilla & Lemon...the house smelled wonderful! 

Golly...she's a talented baker!  She made homemade churros for her Spanish class on Friday!  She's not afraid of trying new things and she works so hard!

Well...enough PROUD MAMA moments!  It's time for this weeks "Make-It Monday" tutorial!


"Make-It Monday": CHRISTMAS GLEAMING gift card holder card created using Stampin' Up! products
All images © 1990-2019 Stampin’ Up!® 

Supplies:
  • Stamp Set – Christmas Gleaming Bundle (153006)
  • Card Stock – Thick Very Vanilla (144237); Pretty Peacock (150880); Brightly Gleaming Specialty Designer Paper (150429); Copper Foil Sheets (142020)
  • Stamp Pads – Pretty Peacock (150083); Night of Navy (147110); Versamark Pad (102283)
  • Miscellaneous – 1” Circle Punch (119868); 2 ¼” Circle Punch (143720); Layering Circles Dies (141705); Tufted 3D Embossing Folder (146335); Aqua Painters (103954); Embossing Buddy (103083); Copper Stampin’ Emboss Powder (141636); Heat Tool (129053); Tear & Tape Adhesive (138995); Mini Stampin' Dimensionals (144108); Stampin' Dimensionals (104430); Die Cutting & Embossing Machine
        
Measurements:  

  • Thick Very Vanilla (base): 4 ¼” x 11”, score at 5 ½”
  • Thick Very Vanilla – scrap
  • Pretty Peacock – 3 ½” x 3 ½”
  • Copper Foil – 4” x 4”
  • Designer Paper – 3” x 12”, score at 5 ½” & 9 ½”

Instructions:

  1. Emboss the card base using the Tufted 3D Embossing Folder.
  2. Fold up the lower half of the designer paper so the opposite pattern is showing to create a pocket. Use the 1” Circle Punch to make a notch in the center of the designer paper. Adhere the pocket closed using Tear & Tape.
  3. Adhere the designer paper to the front and inside base of the cardstock as shown.
  4. Punch a 2 ¼” circle using Pretty Peacock cardstock. Emboss using the Tufted 3D Embossing Folder.
  5. Die cut a slightly larger circle than the Pretty Peacock cardstock using the Copper Foil Sheet and the Layering Circles Dies. Adhere it to the Pretty Peacock cardstock. Adhere these layers to the left side of the designer paper using Dimensionals.
  6. Lightly rub the Very Vanilla scrap cardstock with the Embossing Buddy. Stamp the ornament image using Versamark in on Thick Very Vanilla scrap cardstock. Immediately cover with copper embossing powder and heat set. Punch the ornament out using the coordinating punch.
  7. Using the Aqua Painter and Pretty Peacock ink, color in the ornament. Color in the topper of the ornament using Night of Navy ink. Ink will resist where there is heat embossing so after the cardstock has dried, blog the image using a clean, dry cloth to remove the water/ink from the copper embossed lines. Adhere the ornament to the center of the circle layers using a combination of Dimensionals and Mini Dimensionals.
  8. Stamp the greeting using Night of Navy ink on Thick Very Vanilla scrap cardstock. Cut around the perimeter of the greeting using your scissors. Adhere the greeting, overlapping the ornament as shown, using Mini Dimensionals.
  9. Insert the gift card inside the pocket on the inside of the card.
Isn't that pretty and festive!! SUPER FUN!!  

Thanks so much for stopping by today!  I hope you've had your coffee and are off and going! Stay SAFE and have a FANTASTIC day!  

Here's what's happening with Scrap Happens Here this month!


Please use this months Hostess Code!
(ONLY if your order is less than $150.00)

REMEMBER...use November's hostess code SZCYEYZP and place a minimum order of $50 (before tax and shipping) and you'll get goodies from me!! These will be mailed separately the first week of December! 

You'll receive the following...

  • One Darla Daisy for every $50 spent (before taxshipping).  When you have 10 Darla Daisies you can choose $40.00 of Stampin' Up! product(s) of your choice from me! Just email me your choice!
  • The projects we make in my November classes!  Here's what were making this month! 

You'll also receive this months gift when you spend a minimum of $50  (before tax & shipping)!

JINGLE BELLS
    Jingle Bells
    (an $5.00 value)
~Today's Thought~


Tuesday, May 29, 2018

"Make-It Monday" (ON TUESDAY) - Label Me Pretty

Good Morning everyone!  I hope you had a TERRIFIC long weekend!  I hope you are rested and refreshed and ready for your week!  It's also my hope that you are not being evacuated because of flooding or lava...STAY SAFE my paper crafting friends!  

Today is Tuesday...I know...but because I shared my AMERICAN FLAG Tuesday's Tip video yesterday, Monday (Memorial Day), I'm sharing this weeks "Make-It Monday" on Tuesday!  I LOVE this card...hope you do too!


"Make-It Monday": Label Me Pretty card created with Stampin' Up! products
All images © 1990-2018 Stampin’ Up!® 

Supplies:

  • Stamp Sets – Label Me Pretty (143858w, 143861c); Timeless Textures (140514w; 140517c)
  • Card Stock –Very Vanilla (101650)
  • Stamp Pads – Early Espresso (126974); VersaMark (102283)
  • Miscellaneous – Wood Textures Designer Series Paper Stack (144177); Copper Foil Sheets (142020); Copper Stampin’ Embossing Powder (141636); Heat Tool (129053); 1/4” Copper Trim (144179); Copper Metallic Thread (141696); Pretty Label Punch (143715); Everyday Label Punch (144668); 1 1/4" Circle Punch (119861); Stampin’ Dimensionals (104430)

Measurements:

  • Very Vanilla CS:  4 1/4” x 11”; 4” x 5 1/4”; 2” x 4”
  • Copper Foil Paper: 2 1/2” x 3";
  • Wood Textures DSP: 3 3/4” x 5"
        
Instructions:

  1. Score Very Vanilla cardstock at 5 1/2” then fold to form card base.
  2. Stamp ‘smudge’ images from Timeless Textures around edges of Wood Textures DSP using Early Espresso ink.
  3. Stamp ‘circles’ images randomly on Wood Textures DSP using Early Espresso ink.
  4. Adhere Wood Textures DSP to Very Vanilla CS piece. 
  5. Wrap Copper Trim around Very Vanilla piece and tie in knot.
  6. Add unit to card front using Stampin’ Dimensionals.
  7. Stamp ‘label’ image onto Very Vanilla CS piece using VersaMark ink. Sprinkle with Copper Embossing Powder.  Shake off excess powder.  Heat to melt using Heat Tool.  Punch out using Pretty Label Punch.
  8. Stamp ‘sentiment’ image onto Very Vanilla CS piece using VersaMark ink. Sprinkle with Copper Embossing Powder.  Shake off excess powder.  Heat to melt using Heat Tool. Punch out using 1 1/4" Circle Punch.
  9. Punch Copper Foil using Everyday Label Punch.
  10. Adhere embossed punched Label piece to Copper Foil Label.  Add unit to card front using Stampin’ Dimensionals.
  11. Create multiple loops from Copper Metallic Thread behind embossed punched circle piece.  Add to center of Labels using Stampin’ Dimensionals.
Thanks BUNCHES for stopping by and have a FANTASTIC day!

REMEMBER....use hostess code  B7XFSWQR and place a minimum $50 order (before tax and shipping)...and receive the gift pictured below FREE!

Glimmer Enamel Dots
(a $7.00 value)

You'll also receive the following...

  • Get a Darla Daisy for every $50 spent (before tax & shipping)
  • The projects we make in my May classes!

If your order is $150 or more, DO NOT use the code because you will receive hostess credits. You will get the gift from me FREE automatically along with  the projects we make in May's classes!

Your FREE gifts will be shipped separately and will be shipped by the 1st week in June or before.

~Today's Thought~

Mojo Monday -

Hello and HAPPY MONDAY! Thanks, BUNCHES for stopping by today!  I hope you had a TERRIFIC weekend and found some time to create!  I'm he...