Darla Daisies Loyalty Program & Tracking Form

Darla Hutt-Watson

My photo
Weaverville, CA, United States
Hi there! I'm Darla and I live in BEAUTIFUL Northern California! I am a mother of seven terrific kids and have been married to my husband for 36 years. I have been a Stampin' Up Demonstrator since 2010 and love ALL THINGS paper crafting. I also have a scrapbooking retreat business called Scrap Happens Retreats. I love teaching and learning new techniques, sharing ideas, hosting my retreats, being a wife and a mom. Hiking, bicycling, gardening and cooking are a few of my other hobbies. I'm living for Jesus and LOVIN' LIFE!!
Showing posts with label Sprig Punch. Show all posts

Friday, March 22, 2019

Share What You Love - Sketch Challenge!

Good Morning everyone!  YAY!  It's Friday...your weekend is almost here! Do you have any fun plans?  Will you have any time to create?  I have NO PLANS for the weekend! I do have to head down the mountain today, for Redding, to make a Costco run and do my taxes! My husband took the day off to go with me so we'll probably have a lunch date too!

Today's card is one that I created for a team sketch challenge.  Sketches are FUN...they get me thinking differently. I especially like this one because of the angles!  


Here's the sketch!  Will you try it? There are so many options!  Do you use embossing folders or  designer paper....or do you use only cardstock?  Do you change the circle to an oval or a square?  That banner...do you want to make it from ribbon?  Every single card in the challenge is different!  One gal used a punched dog to replace the circle!  

Let me show you what I did!!

My card base is a 5 1/2" X 8 1/2" piece of Whisper White cardstock with a 4 1/8" X 5 3/8" piece of Rich Razzleberry cardstock as the first layer.  Next I added a 4" X 5 1/4" piece of Share What You Love Designer Paper.  My banner is Old Olive cardstock embossed with the Dot to Dot embossing folder and cut into a banner with the Banner Triple Punch. The angled piece and band piece are also from the Share What You Love designer paper.  I LOVE THIS PAPER!!!

The sentiment is from the Best Bird stamp set and is stamped onto a Stitched Shapes Circle. I stamped the background image in Mint Macaron. I punched the greenery with the Sprig Punch and cut it in half, added some Old Olive Linen Thread and Linen Thread tied together into a bow and attached with a glue dot.  Last I added a flower punched with the Bitty Blooms punch pack (from the same designer paper) and added a pearl as it's center.  Everything except the two layers and the banner are attached with dimensionals!  I LOVE how it turned out! I have a friend whose anniversary is TODAY...YIKES...I'm gonna be late, but I'm gonna send it to her and her husband!

HEY...THANKS BUNCHES for stopping by today and allowing me to SHARE WHAT I LOVE to do with YOU!  Have a wonderful day and terrific weekend!  Hope you (and I) find time to create!

Don't Forget...


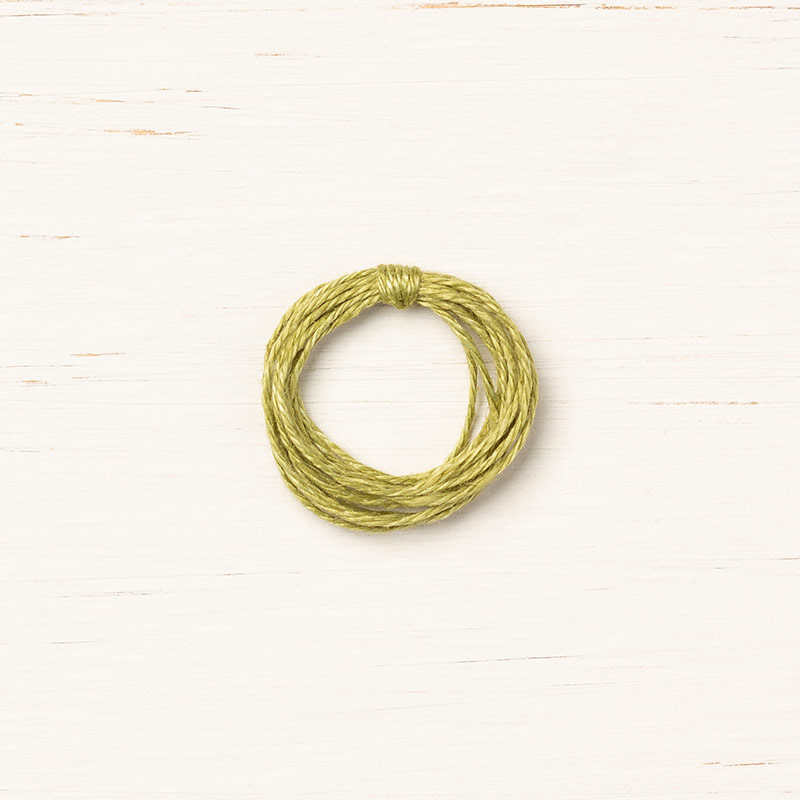
REMEMBER...use this months hostess code RPEWHA6S and place a minimum order of $50 (before tax and shipping...any you will also receive the gift pictured below ABSOLUTELY FREE!

Old Olive Linen Thread
a $5.00 value
olive green crafting thread


You'll also receive the following...

  • One Darla Daisy for every $50 spent (before tax& shipping).  When you have 10 Darla Daisies you can choose $40.00 of Stampin' Up! product(s) of your choice from me! Just email me your choice!
  • The projects we make in my March classes!  Here's what were making this month!


If your order is $150 or more, DO NOT use the code because you will receive hostess credits. You will get the gift from me FREE automatically along with the projects we make in my March classes!


Your FREE gifts will be shipped separately and will be shipped during the 1st week in April!


~Today's Thought~

Thursday, October 4, 2018

Country Lane - FUN FALL CARD

Hello...hello!  I'm was up early to get my daughter down the mountain to the Orthodontist and I had a Mammogram today...left at 7am!  Now I'm home for a volleyball game!  Another busy day! 

I had my first October class last night with eight great ladies!  It's always fun for me to get together with them!  Today, I want to share one of the cards we made!

This FUN FALL card has a 5 1/2" X 8 1/2" Early Espresso card base with a 5 3/8" X 4 1/8" Whisper White first layer!  On top of that is a 4" X 5 1/4" piece of Country Lane designer paper.  The Whisper White circle is cut with the Stitched Shapes Framelits.  The sentiment is from the Country Home stamp set and in stamped in Soft Suede ink.  I created the pumpkin by cutting three circles using the smallest Stitched Shapes Circle die.  Before distressing the edges with Early Espresso in and a dauber, I gave the some texture with the Subtle Embossing Folder. The leaves are punched from Lemon Lime Twist cardstock using the Sprig Punch and is also distressed with Early Espresso ink.  The circle is attached with dimensionals and so is the pumpkin!  

SUPER CUTE...SUPER FUN FALL CARD!!! I LOVE making those pumpkins!  I hope you'll give it a try!  Thanks so much for stopping by today!  Have a FANTASTIC rest of your day...carving out a bit of time to CREATE!!!

REMEMBER....use this months hostess code  9K6G7TSR and place a minimum $50 order (before tax and shipping)...and you will also receive the gift pictured below ABSOLUTELY FREE!

Red Rhinestone Basic Jewels
(a $7.00 value)

You'll also receive the following...

  • One Darla Daisy for every $50 spent (before tax & shipping)
  • The projects we make in my October classes!  Here's what were making this month!


If your order is $150 or more, DO NOT use the code because you will receive hostess credits. You will get the gift from me FREE automatically along with the projects we make in my September classes!

Your FREE gifts will be shipped separately and will be shipped during the 1st week in November.

If you have ANY questions...please contact me!  I'm here to help!


~Today's Thought~


Wednesday, October 3, 2018

12 Weeks of Christmas - Week One...Buffalo Check

Good Morning everyone!  Happy Wednesday...I'm hoping it's a GREAT day for you all!

I have teamed with three other team members to create twelve different Christmas projects and I will sharing those projects...ALONG WITH A TUTORIAL with you!  Every Wednesday for the next twelve weeks these projects will be posted on my blog and my Facebook page!  It won't always be a card...it may be packaging, gift tags, 3-D items etc...I hope you ENJOY it and are INSPIRED to CREATE!!!!


Week One

BUFFALO CHECK card created with Stampin' Up! products
All images © 1990-2018 Stampin’ Up!® 

Supplies:
  • Stamp Sets - Buffalo Check (147794)
  • Card Stock – Gray Granite (146983); Real Red (102482); Pear Pizzazz (131201); Basic Black (121045)
  • Stamp Pads – Staz-On Black (101406)
  • Miscellaneous – Festive Farmhouse Designer Series Paper (147820); Merry Christmas Thinlits Dies (147912); Metallic Pearls (146282); Sprig Punch (148012); Snail Adhesive (104332 or refill 104331); Glue Dots (103683); Liquid Glue (110755)
       
Measurements:  

  • Gray Granite Cardstock- 5 ½” x 8 ½”, folded in half @ 4 ¼” and 5” x 3” for sentiment
  • Real Red Cardstock- 5” x 3 ¾”
  • Festive Farmhouse Designer Series Paper- 5 ½” x 4 ¼”, covers the whole card front
  • Basic Black cardstock- 1” x 5”
  • Pear Pizzazz cardstock- 5” x 3”, for sprigs

Instructions:

  1. Fold your card base in half and adhere the Festive Farmhouse Designer Series Paper to the front using Snail adhesive.  It will cover the whole front of the card.
  2. Ink your Buffalo Check stamp with Staz-On black ink by laying the rubber stamp on your table surface face up and moving the ink pad around to ink it up. Then lay your Real Red cardstock on top of your inked stamp, gently. Lay a piece of scrap paper over that and press all over to get a good stamped image. (Usually we put the stamp to the ink pad, but this way is easier because it’s such a large surface.) Or, you can use your Stamparatus for this part.  
  3. Die cut your sentiment using the Merry Christmas Thinlits Dies and Gray Granite cardstock.  Don’t forget to save your dot for the I in Christmas.   
  4. Punch 4 sprigs using the Sprig Punch and your Pear Pizzazz cardstock.  
  5. Put some snail adhesive on the back of the Basic Black cardstock strip and attach two of the sprigs to the top backside (like shown). You might need to add a little more adhesive then add the black strip to the front of the red cardstock.  
  6. Do the same for the Buffalo Check red piece, add some snail adhesive to the back and position two more sprigs to the bottom corners as shown. Not very much of the sprigs are showing. Then add more snail if needed and add to the card front at an angle.  
  7. Add your die cut sentiment to the front with liquid glue or glue dots- whichever you’re more comfortable with.
  8. Lastly, add a few Metallic Pearls.
REMEMBER....use this months hostess code  9K6G7TSR and place a minimum $50 order (before tax and shipping)...and you will also receive the gift pictured below ABSOLUTELY FREE!

Red Rhinestone Basic Jewels
(a $7.00 value)

You'll also receive the following...

  • One Darla Daisy for every $50 spent (before tax & shipping)
  • The projects we make in my October classes!  Here's what were making this month!


If your order is $150 or more, DO NOT use the code because you will receive hostess credits. You will get the gift from me FREE automatically along with the projects we make in my September classes!

Your FREE gifts will be shipped separately and will be shipped during the 1st week in November.

If you have ANY questions...please contact me!  I'm here to help!

~Today's Thought~

Mojo Monday -

Hello and HAPPY MONDAY! Thanks, BUNCHES for stopping by today!  I hope you had a TERRIFIC weekend and found some time to create!  I'm he...