Darla Daisies Loyalty Program & Tracking Form

Darla Hutt-Watson

My photo
Weaverville, CA, United States
Hi there! I'm Darla and I live in BEAUTIFUL Northern California! I am a mother of seven terrific kids and have been married to my husband for 36 years. I have been a Stampin' Up Demonstrator since 2010 and love ALL THINGS paper crafting. I also have a scrapbooking retreat business called Scrap Happens Retreats. I love teaching and learning new techniques, sharing ideas, hosting my retreats, being a wife and a mom. Hiking, bicycling, gardening and cooking are a few of my other hobbies. I'm living for Jesus and LOVIN' LIFE!!
Showing posts with label Abstract Impressions stamp set. Show all posts

Tuesday, January 21, 2020

Tuesday's Tip - 14 Days of Love - Tube Treat Box

Hello everyone!  Here's today's Tuesday's Tip video!  I hope you're having fun with my 14 Days of Love creations!  I can't wait until February 1st so I can start giving them to my hubby!!


This tube treat box is created with a 5" x 5" piece of Flirty Flamingo cardstock.  It's embossed with the new Parisian Flourish embossing folder and the sentiment is from the Abstract Impressions stamp set.

You can also create these cute tubes in 3" x 3", 4" x 4" all the way to 12" x 12".  I hope you'll give it at try!


THANKS BUNCHES for stopping by today! I love sharing my creations with you all!
Scroll down to see what's happening this month at Scrap Happens Here with Darla!!

FIRST...it's SALE-A-BRATION and for EVERY $50 you spend (before tax and shipping) you can choose a FREE item from the SALE-A-BRATION Brochure!!  

YAY!!! I LOVE THIS TIME OF YEAR!!

Here's what you'll get only from me, with a $50 order 
(before tax & shipping)
and
Use January's Hostess Code!

You'll receive the following...
  • One Darla Daisy for every $50 spent (before taxshipping).  When you have 10 Darla Daisies you can choose $40.00 of Stampin' Up! product(s) of your choice from me! Just email me your choice!
  • The projects we make in my January classes!  Here's what were making this month! 

You'll also receive this months gift when you spend a minimum of $50  
(before tax & shipping)!


    Heart Epoxy Droplets 
    (a $6.50 value)
    (just in time for Valentines Day) 

    REMEMBER...use January's hostess code HZMK6B2U and place a minimum order of $50 (before tax and shipping) and you'll get goodies from me!! These will be mailed separately the first week of February!
~Today's Thought~
20 Funny Valentines Day Food Puns That are Spot On - bemethis #valentine'sday #v... -  20 Funny Valentines Day Food Puns That are Spot On – bemethis #valentine‘sday #valentine‘s #d - #bemethis #Day #Food #funny #Puns #Spot #valentine #ValentineDayfriends #ValentineDaygoals #ValentineDayrecipes #ValentineDayroses #ValentineDaytumblr #ValentineDaywreath #valentines #valentinesday

Sunday, December 23, 2018

#simplestamping Sunday - Abstract Impressions

Hi everyone!  I know...it's Sunday and I don't usually blog on Sundays but I'm trying a new challenge!  At OnStage, Stampin' Up!'s convention back in November, we were challenged do some simple stamping using the Stampin' Up! Note Cards.  These cards are terrific for simple stamping because they are only 5" X 3 1/2", which lessens the white space!  I'm really having fun with it and thought I'd share what I'm doing! 

Each month Stampin' Up! is giving us a challenge and December's theme is to create a Thank You card using the note cards, ink, and ONE stamp. That meant I had to find a stamp set with a thank you sentiment in it!  Well...I found a FUN one from the NEW Occasion's Catalog and made three cards! Then I read the rules again and it needed to be a stamp set from the Annual Catalog, so back out to my workshop I went (after church today)!  I'm here to share ALL of the #simplestamping thank you cards I created!  I hope you're INSPIRED to do some #simplestamping ...it's a bit addicting!


Here's the #simplestamping card I did right!  I used Note Cards, Ink (Flirty Flamingo, Lovely Lipstick, Certainly Celery and Memento Black) and ONE stamp set (Abstract Impressions)!

I really like how it turned out!  It's crisp, clean and simple!  Another really cool thing is you can change it up with a different sentiment...like Happy Birthday, Love You, Miss You, Hello, Happy for You, Congratulations!  The possibilities are endless! 

Below are the three cards that can't be used for the challenge as I used a stamp set from the Occasions Catalog called Beauty Abounds! You are going to LOVE the new catalog and Sale-a-bration!  For these cards I used Memento Black, Daffodil Delight, Gorgeous Grape, Highland Heather and Coastal Cabana inks.  Again...I LOVE the simplicity of these cards!!


So I've decided that I really LOVE the #simplestamping idea! I'm incorporating it into my blog, Facebook, Instagram and I'm even going to offer some upcoming #simplestamping classes!  

You may be wondering why I keep using #simplestamping - it's because Stampin' Up! challenged us to include it in our posts and are giving random prizes!  It's ALWAYS fun to get a prize!

Hey, THANKS BUNCHES for stopping by today!  I'll see you in the morning with a new "Make-It Monday"!  ENJOY the rest of your day!! 

REMEMBER...use this months hostess code GNYF6RFR and place a minimum order of $50 (before tax and shipping...any you will also receive the gift pictured below ABSOLUTELY FREE!

Pearl Basic Jewels
(a $5.00 Value)


You'll also receive the following...

  • One Darla Daisy for every $50 spent (before tax & shipping).  When you have 10 Darla Daisies you can choose $40.00 of Stampin' Up! product(s) of your choice from me! Just email me your choice!
  • The projects we make in my December classes!  Here's what were making this month!

If your order is $150 or more, DO NOT use the code because you will receive hostess credits. You will get the gift from me FREE automatically along with the projects we make in my Decembver classes!

Your FREE gifts will be shipped separately and will be shipped during the 1st week in January.

                                    ~Today’s Thought~


Monday, October 15, 2018

"Make-It Monday" Abstract Impressions Wreath

Good morning everyone!  Happy Monday! Did you have a wonderful weekend?  My Saturday was a day full of volleyball with some Artist's In Action in between!  Several local artists lined our downtown, sharing and teaching their art!  It was a lot of fun walking down the street seeing all that was available.  I also had a blast watching my daughters team play.  They won 2nd place in the tournament!  It was a FUN day!

Here we are...Monday again and it's time for "Make-It Monday"!  ENJOY!!


"Make-It Monday": ABSTRACT IMPRESSIONS wreath card created with Stampin' Up! products
All images © 1990-2018 Stampin’ Up!® 

Supplies:
  • Stamp Sets – Abstract Impressions (147513)
  • Card Stock – Whisper White (10073)
  • Stamp Pads – Berry Burst (147143); Granny Apple Green (147095); Memento (132708)
  • Miscellaneous – Silver Foil Sheets (132178); Layering Ovals Framelits (141705); Berry Burst 3/8” Metallic Edge Ribbon (145489); Silver Mini Sequin Trim (144230); Mini Glue Dots (103683); Clear Rhinestones (144220); Pencil
        
Measurements:  

  • Whisper White (base): 5 ½” x 8 ½”, score at 4 ¼” and folded
  • Whisper White (layer): 4” x 5 ¼”
  • Silver Foil: 4 1/8” x 5 3/8”
  • Ribbon: 8”
  • Sequin Trim: 4”

Instructions:

  1. Using the pencil, lightly trace your desired size circle using a Layering Circles Framelits onto the Whisper White layer.
  2. Stamp the solid flower image using Berry Burst ink directly over the pencil line. Stamp off one layer of ink on scratch paper to reduce the color of ink. Repeat this process stamping off each time, to fill the traced circle. If you need to “squeeze in” a flower, do it in an area that the bow will later cover it.
  3. Stamp the smaller, detailed flower image using Berry Burst ink, directly over the solid flower images. Repeat this process stamping each flower.
  4. Stamp the small solid leaves image using Granny Apple Green ink, filling in between the flowers as desired.
  5. Stamp the greeting in the center of the wreath using Memento ink.
  6. Tie a bow using the ribbon. Add the Sequin Trim to the back of the bow using a Glue Dot. Adhere the bow/trim to the wreath using several Glue Dots.
  7.  Add rhinestones to the center of each flower.
Well...thanks so much for stopping by today!  I hope you've been inspired!  Isn't this wreath just beautiful!  Let's all find some time to create today!  Have a FANTASTIC day!

REMEMBER....use this months hostess code  9K6G7TSR and place a minimum $50 order (before tax and shipping)...and you will also receive the gift pictured below ABSOLUTELY FREE!


Red Rhinestone Basic Jewels
(a $7.00 value)

You'll also receive the following...

  • One Darla Daisy for every $50 spent (before tax & shipping)
  • The projects we make in my October classes!  Here's what were making this month!


If your order is $150 or more, DO NOT use the code because you will receive hostess credits. You will get the gift from me FREE automatically along with the projects we make in my September classes!

Your FREE gifts will be shipped separately and will be shipped during the 1st week in November.

If you have ANY questions...please contact me!  I'm here to help!


~Today's Thought~

Friday, September 7, 2018

September Facebook Hop - WISHES

Hey there!  Yep...I'm back!  It's Facebook Hop time again and here's what I created for our Children/Kids them hop! 


My card base is a 5 1/2" X 8 1/2" piece of Whisper White cardstock.  My first mat is a 4" X 5 1/4" piece of Granny Apple Green cardstock. My next mat is a 3 7/8" X 5 1/8" peace of Coastal Cabana cardstock.  My stamped image is a 3 3/4" x 5" piece of Whisper White cardstock.  I used the my "E" Clear Block to stamp a background by inking it up, spritzing it with water and stamping onto the cardstock.  Next I stamped the grass with the Abstract Impressions stamp set in Granny Apple Green. I used the Dandelion Wishes stamp set to stamp and emboss using VersaMark and White Embossing Powder.  The sentiment is from the Broadway Birthday stamp set and is stamped with Lemon Lime Twist ink. I used the Delicate Lace Edgelits cut a strip of Basic Black cardstock and added it to the bottom of the sentiment!  I have a hard time with kids cards...unless they are babies, but I'm really happy with how this card turned out!  I was remembering summer days of making wishes and having fun 

Hey...THANKS BUNCHES for stopping by twice today!  I hope you enjoyed the hop and got lots of FUN ideas!  Have a FABULOUS weekend!


REMEMBER....use this months hostess code  FGYGZMR9 and place a minimum $50 order (before tax and shipping)...and you will also receive the gift pictured below ABSOLUTELY FREE!

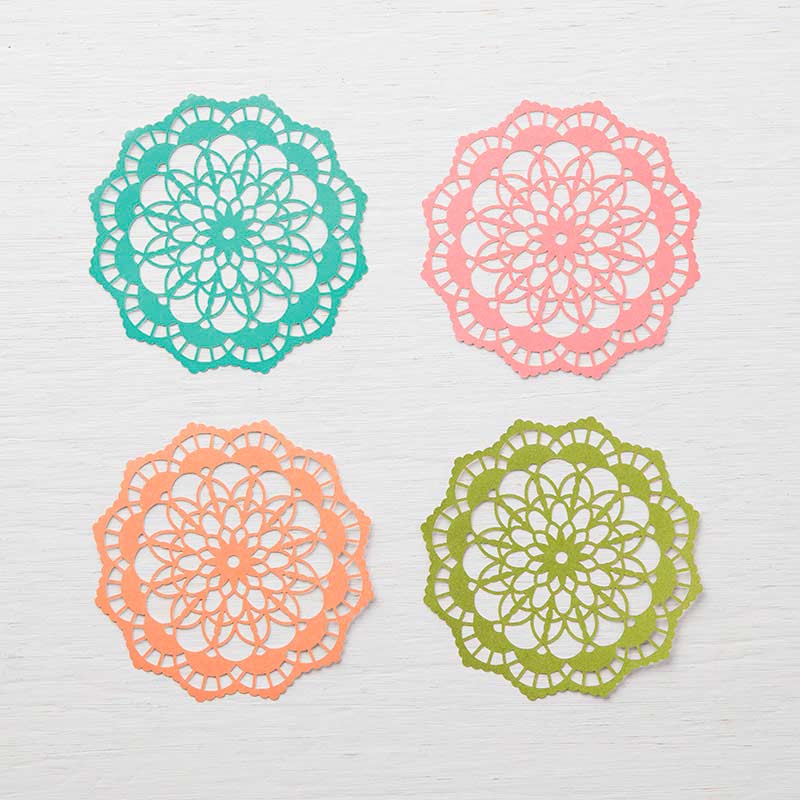
Colored Doilies (a $4.50 value).

* 24 doilies - 6 each of 4 colors: Coastal Cabana, Flirty Flamingo, Grapefruit Grove, Old Olive  * 3" (7.6 cm)
Colored Doilies

You'll also receive the following...

  • One Darla Daisy for every $50 spent (before tax & shipping)
  • The projects we make in my September classes!  Here's what were making this month!
No automatic alt text available.

If your order is $150 or more, DO NOT use the code because you will receive hostess credits. You will get the gift from me FREE automatically along with the projects we make in my September classes!

Your FREE gifts will be shipped separately and will be shipped during the 1st week in October or before if possible or along with the free class items if you order the bundle.

If you have ANY questions...please contact me!  I'm here to help!

~Today's Thought~
.... #wish #inspiration #quote …

Monday, June 25, 2018

"Make-It Monday" Abstract Impressions


Hello everyone!  Happy Monday!  Are you ready for your week?  Oh my...I am not...I've been sick and now my daughter is sick...hopefully on the mend soon!  There is a barrel racing event here in town Friday night and she really wants to participate...I'm praying she will be well enough by then!  I hope all of you AVOID it! 

It's Monday, and you know what that means...a NEW "Make-It Monday"!


"Make-It Monday": Abstract Impressions card created with NEW Stampin' Up! products
All images © 1990-2018 Stampin’ Up!® 

Supplies:

  • Stamp Sets – Abstract Impressions (147513)
  • Card Stock – Grapefruit Grove (146972); Crumb Cake (120953); Whisper White (100730)
  • Stamp Pads – Grapefruit Grove (147142); Call Me Clover (147139); Whisper White Craft Pad & Refill (145406)
  • Misc. – Nature’s Poem Designer Paper (146338); Crumb Cake 3/8” Classic Weave Ribbon (144162); Embossing Buddy (103083); White Stampin’ Emboss Powder (109132); Heat Tool (129053); Iridescent Sequin Assortment (144212); Fine-Tip Glue Pen (138309); Mini Glue Dots (103683); Stampin’ Dimensionals (104430); Pencil
       
Measurements:  

  • Grapefruit Grove (base): 5 ½” x 8 ½”, scored at 4 1/4” and folded
  • Crumb Cake: 3 7/8” x 5 1/8”
  • Crumb Cake: ¾” x 2 ¾”
  • Whisper White: 3 ¾” x 5”
  • Designer Paper: 1 ¼” x 5”
  • Ribbon: 6” and 16”

Instructions:

  1. Place the designer paper at the bottom of the Whisper White layer for placement. Using a pencil, draw a light line so you will have an indication where to stamp the flowers.
  2. Stamp the larger, solid stems image using the Call Me Clover ink. Stamp off one layer of ink to reduce the shade. Stamp the stems on the far-right side of the Whisper White layer at the pencil line. Repeat for a second row as shown. Stamp the smaller, solid stems using the Call Me Clover ink. Stamp directly over the first set of stems. Don’t worry about aligning them.
  3. Stamp the Poppy flower image using Grapefruit Grove ink directly above the first set of stems on the far-right. Repeat for the second set of stems, stamping off one layer of ink. Don’t worry about aligning the flowers to the stems.
  4. Adhere the designer paper to the bottom of the Whisper White layer.
  5. Adhere the 6” piece of ribbon between the designer paper and the stems using Glue Dots. Create a double bow using the 16” piece of ribbon. Adhere to the right side as shown using Glue Dots.
  6. Rub the Embossing Buddy on the ¾” x 2 ¾” piece of Crumb Cake cardstock. Stamp the greeting using Whisper White Craft ink. Immediately sprinkle with the White Stampin’ Emboss Powder. Heat set. Adhere the greeting to the lower left side of the card base using Dimensionals.
  7. Adhere two Iridescent Sequins using Fine-Tip Glue. Let dry.
Well...that's it for today!  THANKS BUNCHES for stopping by!  I hope you have a FANTASTIC day and week!! I hope you find some time to CREATE!!!
REMEMBER....use hostess code  PWB2DCJS and place a minimum $50 order (before tax and shipping)...and receive the gift pictured below FREE!


Share What You Love Artisan Pearls
(a $6.00 value)


You'll also receive the following...

  • Get a Darla Daisy for every $50 spent (before tax & shipping)
  • The projects we make in my June classes!

If your order is $150 or more, DO NOT use the code because you will receive hostess credits. You will get the gift from me FREE automatically along with  the projects we make in May's classes!

Your FREE gifts will be shipped separately and will be shipped by the 1st week in July or before.


~Today's Thought~
Follow your instincts. Be curious. Dream big. Love what you do. Love learning. Keep and open heart and a strong spirit. Have fun. #wisdom #affirmations

Tuesday, June 19, 2018

Tuesday's Tip - Using your Stamparatus

Hello Everyone!  Here were are...TUESDAY again and it's time for Tuesday's Tip!


Here's the finished card with the measurements!


Measurements:
Whisper White Cardbase – 5 ½” X 8 ½”
Lemon Lime Twist -  4” x 5 ¼”
Whisper White (image) -  2 ½” X 3 ½”
Lemon Lime Twist (mat) – 2 5/8” X 3 5/8”
Mossy Meadow (mat) – 2 ¾” X 3 ¾”

The colors I used are Mossy Meadow, Lemon Lime Twist, Flirty Flamingo and Lovely Lipstick. 

Last...I used Burlap Ribbon, Lemon Lime Twist Ombre Ribbon and Linen Thread.


Thanks BUNCHES for stopping by! I sure hope this inspires you to use your Stamparatus...or get your Stamparatus!  It's a FANTASTIC tool that you will use again and again!  Have a GREAT rest of your day!

REMEMBER....use hostess code  PWB2DCJS and place a minimum $50 order (before tax and shipping)...and receive the gift pictured below FREE!

Share What You Love Artisan Pearls
(a $6.00 value)


You'll also receive the following...

  • Get a Darla Daisy for every $50 spent (before tax & shipping)
  • The projects we make in my June classes!

If your order is $150 or more, DO NOT use the code because you will receive hostess credits. You will get the gift from me FREE automatically along with  the projects we make in May's classes!

Your FREE gifts will be shipped separately and will be shipped by the 1st week in July or before.

~Today's Thought~
A cup of tea is a cup of peace. #goodidea #tea

Mojo Monday -

Hello and HAPPY MONDAY! Thanks, BUNCHES for stopping by today!  I hope you had a TERRIFIC weekend and found some time to create!  I'm he...