Darla Daisies Loyalty Program & Tracking Form

Darla Hutt-Watson

My photo
Weaverville, CA, United States
Hi there! I'm Darla and I live in BEAUTIFUL Northern California! I am a mother of seven terrific kids and have been married to my husband for 36 years. I have been a Stampin' Up Demonstrator since 2010 and love ALL THINGS paper crafting. I also have a scrapbooking retreat business called Scrap Happens Retreats. I love teaching and learning new techniques, sharing ideas, hosting my retreats, being a wife and a mom. Hiking, bicycling, gardening and cooking are a few of my other hobbies. I'm living for Jesus and LOVIN' LIFE!!
Showing posts with label Mountain Air. Show all posts

Monday, April 13, 2020

"Make-It Monday" Botanical Prints and Mountain Air

Hello everyone!  How was your Easter?  Was it weird?  Was it somewhat normal?  I hope it was wonderful!  Mine was nice.  I had a Costco spiral ham in the freezer and baked it, made twice baked potatoes, fresh green beans and deviled eggs.  It was really nice.  My two oldest sons were here, helping their younger brother move into his first home!  It was a really good weekend, in spite of all that is happening! 

Hey...It's Monday and that means it's time for another "Make-It Monday" tutorial and today, I have TWO!!  I hope they get your creative juices flowing!


Botanical Prints
All images © 1990-2020 Stampin’ Up!®


Supplies:
·         Botanical Prints product medley (#151301)
·         Tuxedo Black Memento ink (#132708)
           
Measurements: 
·         Basic Black: 8 1/2” x 5 1/2”, 3 1/4” x 4 1/4”
·         Crushed Curry designer paper: 4” x 5 1/4”
·         Black & White designer paper: 3” x 4”
·         Crushed Curry: 3” x 3"

Instructions:
1.    Attach the Crushed Curry designer paper to the Basic Black card base.
2.    Attach the black and white designer paper to the Basic Black layer.
3.    Use the die to cut both corners from the Crushed Curry cardstock and attach them to the black and white designer paper.
4.    Wrap the Old Olive ribbon around this layer and tie it in a bow.
5.    Attach this layer to the card using Stampin’ Dimensionals.
6.    Attach the printed die cut as shown.
7.    Using Memento Black ink, stamp the greeting onto the label. Then ink of the image and stamp it onto scrap paper a couple of times and then directly over the greeting on the label.
8.    Attach the label to the card using Stampin’ Dimnsionals.


Mountain Air
All images © 1990-2020 Stampin’ Up!®


Supplies:

·         Stamp SetsMountain Air Bundle (153820); Pedal to the Metal (151591)
·         Card Stock – Gray Granite (146983); Whisper White (100730)
·         Stamp Pads – Balmy Blue (147105); Gray Granite (147118); Basic Gray (149165); Mossy Meadow (147111)
·         Misc. – Linen Thread (104199); Snail Adhesive (104332); Stampin’ Dimensionals (104430)
           
Measurements:  
·         Card Stock 1: Gray Granite            8 1/2” x 5 1/2”                        4” x 1”
·         Card Stock 2: Whisper White         5 ¼” x 4”                                 4 ½” x 3” for trees                
           

Instructions:

1.    Start with the Whisper White Cardstock layer and stamp the mountains in the back with Balmy Blue ink.
2.    Next, stamp the backside of the row of trees at the base of the mountains with Gray Granite ink.
3.    Stamp the row of trees (the side of the stamp with detail) on top of the shadow with Basic Gray ink.
4.    Stamp 3 sets of birds in the sky with Basic Gray ink. Stamp some clouds with Balmy Blue but stamp off on scrap paper first for a lighter shade.
5.    Stamp 3 trees on Whisper White scrap paper at least 4 ½” x 3” using Mossy Meadow ink. I stamped off for 2 of the trees and one is full strength. Die cut the trees using the Majestic Mountain dies in the bundle.
6.    Use snail adhesive to attach the trees to the stamped layer.
7.    Stamp the sentiment (from the stamp set Petal to the Medal) on the Gray Granite Cardstock strip and attach to the stamped layer with Stampin’ Dimensionals.
8.    Wrap Linen Thread around the area where the trees are 2 times and tie a bow.
9.    Then, attach that whole layer to the card front using snail adhesive. 


Hey...thanks BUNCHES for stopping by today!  

Thank you for letting me share what I love to do......with you!  
Have a WONDERFUL day!!

Here's what's I have for you during the month of April!


Use April's Hostess Code!


This is what you'll get only from me with a qualifying order!
(To qualify, place a minimum order of $50.00, before tax & shipping, using the April Hostess Code.  If your order is over $150.00 please DO NOT use the hostess code...it is still a qualifying order but you will get the hostess credit for yourself!)  

  • One Darla Daisy for every $50 spent (before taxshipping).  When you have 10 Darla Daisies you can choose $40.00 worth of  Stampin' Up! product(s) of your choice from me! Get your tracking form at the top this blog by clicking on Darla Daisy Loyalty Program.  When you have 10 daisies, email, call or text me your choice!!
  • Two handmade cards by me (non-specific because there are no classes)!
  • This months gift!
Flower Faceted Gems
an $8.00 Value

~Today's Thought~


Wednesday, March 11, 2020

Another Mountain Air Tutorial.....

Hello there!  I hope all is well with you and yours!  Life is crazy busy with classes, kids and the husband and I LOVE all of it!!!

I have another BEAUTIFUL Mountain Air card to share with you today!  I LOVE this stamp set...it's one of my FAVORITES!  I hope you are enjoying the tutorials and giving them a try!  If you need any of the supplies you can get them at my store by clicking on SHOP NOW on the top, right side of my blog!


Mountain Air Telescope

All images © 1990-2020 Stampin’ Up!®

Supplies:

·         Stamp Sets: Mountain Air (151610), Timeless Tulips (151534)
·         Cardstock: Pretty Peacock (150880), Night of Navy (100867), Whisper White (100730)
·         Ink: Pretty Peacock (150083), Night of Navy (147110), Highland Heather (147103), Smoky Slate (147113)
·         Tools & Accessories: Stitched Rectangle Dies (148551), Majestic Mountain Dies (151608), Holiday Rhinestone Basic Jewels (150457), Silver Metallic Thread (138402)
·         Misc: Multipurpose Liquid Glue (110755), Stampin’ Dimensionals (104430), Mini Stampin’ Dimensionals (144108), Stamping Sponges (141337), Foam Adhesive Strips (141825)
           
Measurements: 

·         Card Base: Pretty Peacock 8 ½” x 5 ½” scored at 4 ¼”
·         Cardstock #2: Night of Navy:  5 ¼” x 4”
·         Cardstock #3: Whisper White: 5” x 3 ¾”, 5 ¼” x 4”, Scrap approximately 2” x 3”

Instructions:

·         Sponge lightly the 5” x 3 ¾” Whisper White Cardstock, begin with Night of Navy Ink at the Top and then lightly sponge Highland Heather Ink Over the top.  From the bottom working up lightly sponge with Pretty Peacock Ink, leaving just a small amount of the Whisper White Cardstock visible before you get to the Night Of Navy.
·         Beginning stamping with the detailed Mountains stamp using Smoky Slate Ink at the horizon line.
·         Reverse this stamp above and stamp the shadows above the mountain with Smoky Slate making sure to stamp off 1 time, then ink and stamp off 2 times while moving the mountains up from the original image. 
·         Ink the image above one more time and stamp off 3 times and stamp on top of the detailed mountain image.
·         Beginning at the bottom, using Pretty Peacock Ink and stamp the detailed trees image, then ink again and stamp off 1 time and move up above the original stamped tree images.
·         Continue the step above making sure to stamp off multiple times until you reach the horizon line.
·         Reverse the stamp above and stamp the shadows above the trees with Pretty Peacock making sure to stamp off 1 time, then ink and stamp off 2 times while moving the trees up from the original image.
·         Using the Stitched Rectangle Dies, 4 ¾” x 3 3/8”, 3 7/8” x 2 9/16”, 3 1/8” x 1 ¾”, center them on the above stamped image.  Making sure everything is centered.  Use Scotch Removable Tape or a Post-It-Note to hold dies in place while cutting.
·         Stamp the Sentiment from the Timeless Tulip Stamp Set in Night of Navy Ink in the bottom right-hand corner of the center piece rectangle.
·         Adhere the Night of Navy Cardstock to the Card Base.
·         Dry Fit the 3 Stitched Rectangle Pieces on the front of the layer above, centering it.
·         Adhere the center rectangle with Multipurpose Liquid Adhesive.
·         Adhere the middle rectangle using Stampin’ Dimensionals.
·         Adhere the outer rectangle using Foam Adhesive Strips.
·         Stamp the Double Tree Image on the scrap of Whisper White using Pretty Peacock Ink.
·         Die cut the image above with the coordination die and ink edges with Stamping Sponges and Night of Navy Ink and Highland Heather Ink.
·         Wrap Silver Metallic Thread around 3 fingers 5 7 times and adhere to the back of the trees above.
·         Adhere the trees above to the bottom left-hand corner of rectangle using adhesive and Mini Stampin’ Dimensionals for the recessed second rectangle.
·         Place 3 of the Holiday Rhinestone Basic Jewels in the top right-hand corner of the large rectangle.
·         Stamp the double trees image on the Whisper White 5 ¼” x4” Inside Layer and adhere using Multipurpose Liquid Adhesive.

Thanks so much for stopping by today! I hope you'll give this card a try!  Don't be intimidated...you'll want to make more once you've made this one!


Scroll down to see what's happening this month at Scrap Happens Here with Darla!!


 SALE-A-BRATION is in its last month and for EVERY $50 you spend (before tax and shipping) you can choose a FREE item from the SALE-A-BRATION Brochure!!  

YAY!!! I LOVE THIS TIME OF YEAR!!

Here's what you'll get only from me, with a $50 order 
(before tax & shipping)
and
Use the March Hostess Code!


You'll receive the following...
  • One Darla Daisy for every $50 spent (before taxshipping).  When you have 10 Darla Daisies you can choose $40.00 of Stampin' Up! product(s) of your choice from me! Just email me your choice!
  • The projects we make in my March classes!  Here's what were making this month!

You'll also receive this months gift when you spend a minimum of $50  
(before tax & shipping)!

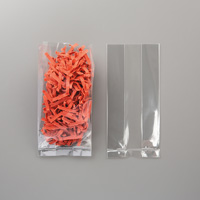
gusseted candy bag
3 x 6 Gusseted Cellophane Bag
(A $5.00 Value)

    REMEMBER...use the March hostess code JAD9JGZY and place a minimum order of $50 (before tax and shipping) and you'll get goodies from me!! These will be mailed separately the first week of April.

    ~Today's Thought~
    #lifequotes #funnyquotes #quotes #memes #funnymemes #life "So it turns out that being an adult is mostly just googling how to do stuff."- Anonymous

Monday, March 9, 2020

"Make-It Monday" - Mountain AIr

Good Morning everyone! Happy Monday!  How was your weekend?  Did you get any crafting done?  I've been busy creating and getting ready for classes...it was really good!  I hope yours was too!

Well...it's Monday and you know what that means!  It's time for another "Make-It Monday"!


"Make-It Monday" Mountain Air


All images © 1990-2020 Stampin’ Up!®

Supplies:
·         Stamp Sets: Mountain Air (151610), Sending You Thoughts (152297)
·         Cardstock: Crumb Cake (120953), Blueberry Bushel (146968), Whisper White (100730)
·         Ink: Crumb Cake (147116), Blueberry Bushel (147138), Garden Green (147089), Shaded Spruce (147088), Early Espresso (147114)
·         Tools & Accessories: Majestic Mountain Dies (151608), Stitched So Sweetly Dies (151690), Stampin’ Blends Light Pool Party (144595), Linen Thread (104199)
·         Designer Paper: Tropical Oasis (151252)
·         Misc: Snail Adhesive (104332), Mini Glue Dots (103683), Stampin’ Dimensionals (104430)
           
Measurements: 
·         Card Base: Crumb Cake 11” x 4-1/4”
·         Cardstock #2: Blueberry Bushel 4” x 2-1/2”
·         Cardstock #3: Whisper White 4” x 2-1/2” and 2” x 2-1/2”
·         Designer Paper: Tropical Oasis (5-1/4” x 4”)
           
Instructions:
·         Score and fold the Crumb Cake card base in half as you would if you were making a normal card.
·         Stamp “Happy Birthday” from the Sale-a-bration stamp set Sending You Thoughts using Blueberry Bushel ink.  Adhere this piece to the card base.
·         Using the label looking die from the Stitched So Sweetly dies, cut out one from Whisper White cardstock and one from Blueberry Bushel cardstock.
·         Note: The Mountain Air Stamp Set is a reversable, so that you can create a striking outdoor scene. One side features a silhouette and the other side is a detailed image.
On the Whisper White die cut piece, stamp the mountains with Crumb Cake ink using the silhouette side (the flat side).  Clean the stamp and flip the stamp over and use the detailed image side to stamp the mountains in Blueberry Bushel over the silhouette of the mountains.
·         Using Garden Green ink, stamp the silhouette of the tree just below the mountains.  Clean the stamp and flip it over to use the detailed image of the trees.  Using Shaded Spruce ink, stamp the trees on top of silhouette.
·         Color the sky with the Light Pool Party Stampin’ Blends.
·         Using Early Espresso stamp the birds in the sky above the mountains.
·         Using Shaded Spruce ink stamp the image of the 2 trees on to the smaller piece of the Whisper White cardstock and die cut using the Majestic Mountain Dies.
·         Adhere the mountain scenery to the Blueberry Bushel die cut.  Use Stampin’ dimensionals on the back of both pieces and adhere to the DSP.
·         Put 2 dimensionals on the back of the bottom of the trees and Snail on the back of the top of the trees and adhere.
·         Tie a small bow with the Linen Thread and adhere to the top of the label with a glue dot.
·         Stamp or write a sentiment on the inside of card.

THANKS BUNCHES for stopping by today!  
HAVE A GREAT DAY!!


Scroll down to see what's happening this month at Scrap Happens Here with Darla!!


 SALE-A-BRATION is in its last month and for EVERY $50 you spend (before tax and shipping) you can choose a FREE item from the SALE-A-BRATION Brochure!!  

YAY!!! I LOVE THIS TIME OF YEAR!!

Here's what you'll get only from me, with a $50 order 
(before tax & shipping)
and
Use the March Hostess Code!


You'll receive the following...
  • One Darla Daisy for every $50 spent (before taxshipping).  When you have 10 Darla Daisies you can choose $40.00 of Stampin' Up! product(s) of your choice from me! Just email me your choice!
  • The projects we make in my March classes!  Here's what were making this month!

You'll also receive this months gift when you spend a minimum of $50  
(before tax & shipping)!

gusseted candy bag
3 x 6 Gusseted Cellophane Bag
(A $5.00 Value)

    REMEMBER...use the March hostess code JAD9JGZY and place a minimum order of $50 (before tax and shipping) and you'll get goodies from me!! These will be mailed separately the first week of April.

    ~Today's Thought~
    (It's that kind of Monday!)

Mojo Monday -

Hello and HAPPY MONDAY! Thanks, BUNCHES for stopping by today!  I hope you had a TERRIFIC weekend and found some time to create!  I'm he...