Darla Daisies Loyalty Program & Tracking Form

Darla Hutt-Watson

My photo
Weaverville, CA, United States
Hi there! I'm Darla and I live in BEAUTIFUL Northern California! I am a mother of seven terrific kids and have been married to my husband for 36 years. I have been a Stampin' Up Demonstrator since 2010 and love ALL THINGS paper crafting. I also have a scrapbooking retreat business called Scrap Happens Retreats. I love teaching and learning new techniques, sharing ideas, hosting my retreats, being a wife and a mom. Hiking, bicycling, gardening and cooking are a few of my other hobbies. I'm living for Jesus and LOVIN' LIFE!!

Thursday, April 8, 2021

Blossoms In Bloom Gate Fold Tutorial

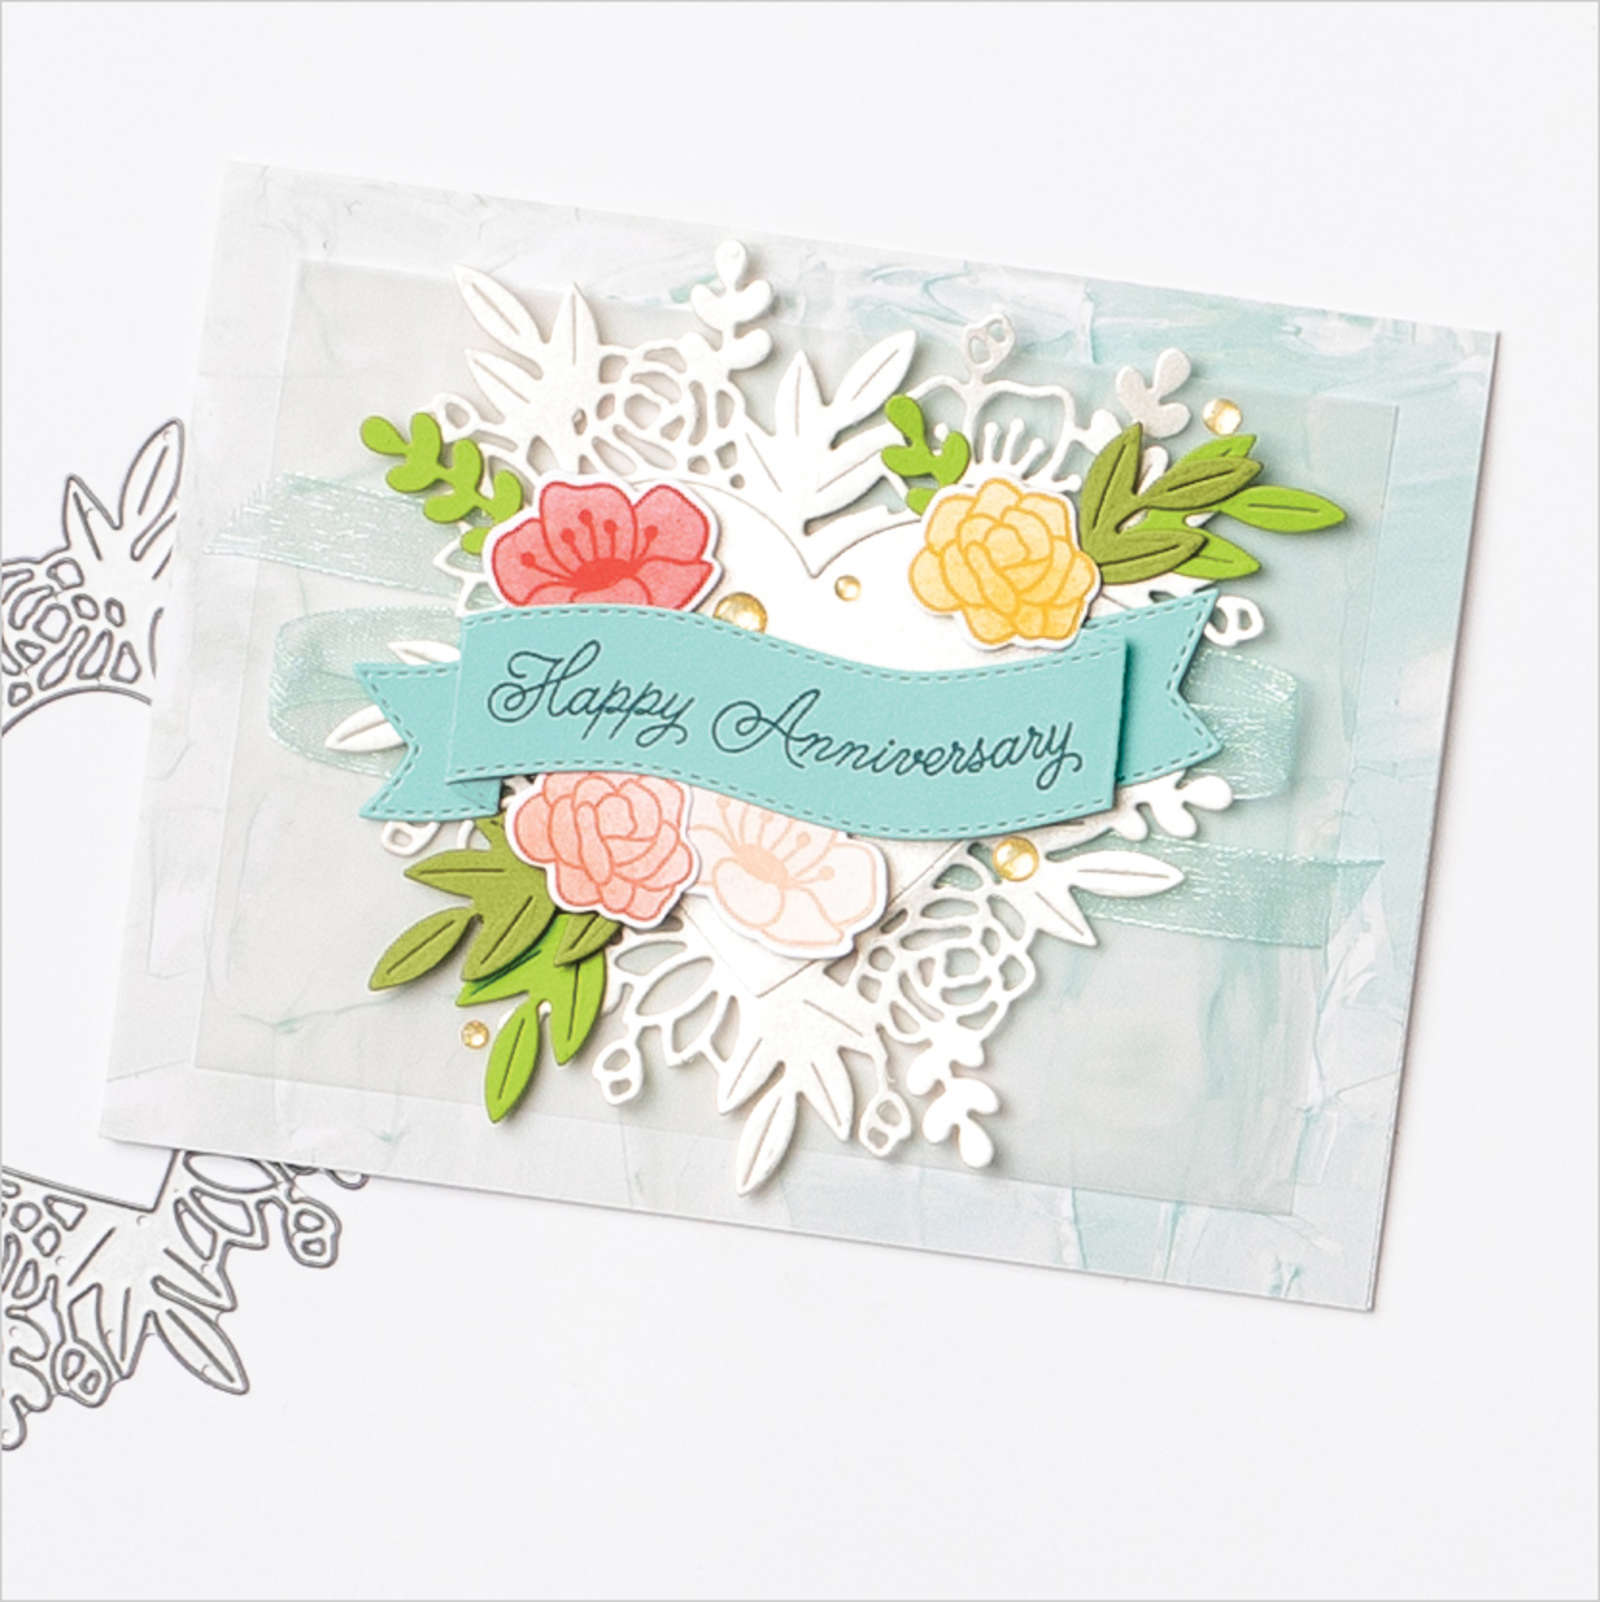
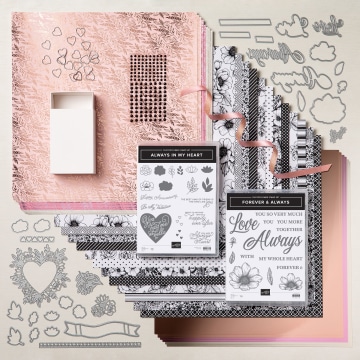
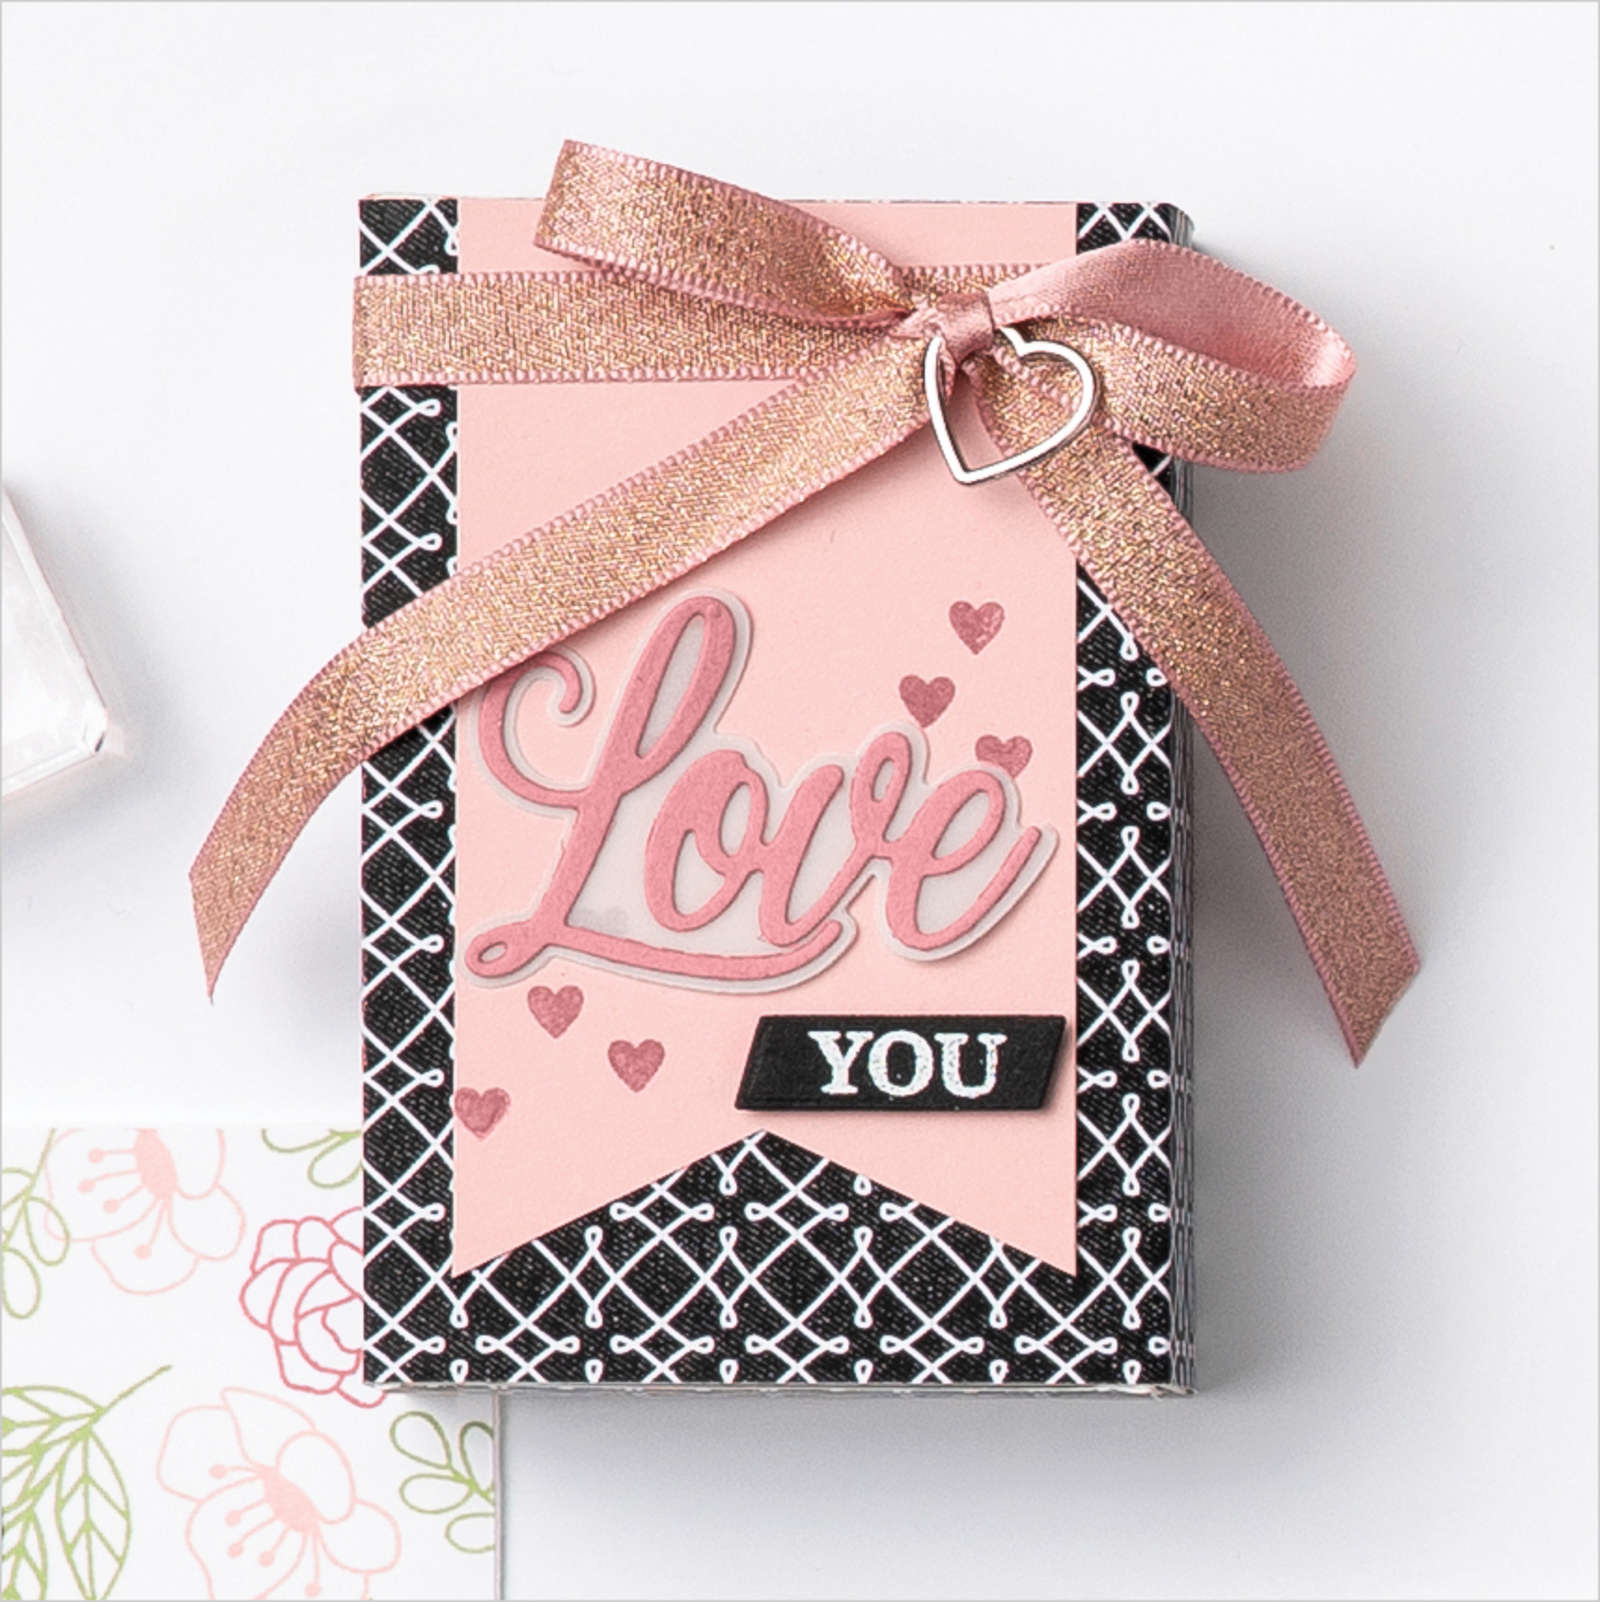
Hello everyone!  I hope you all have a TERRIFIC Thursday!  YAY...the weekend is coming!  Hey...I have a tutorial I think you'll like to share with you today! It has a fun fold and is really beautiful!  I hope it INSPIRES you!

All images © 1990-2021 Stampin’ Up! ®


Supplies:

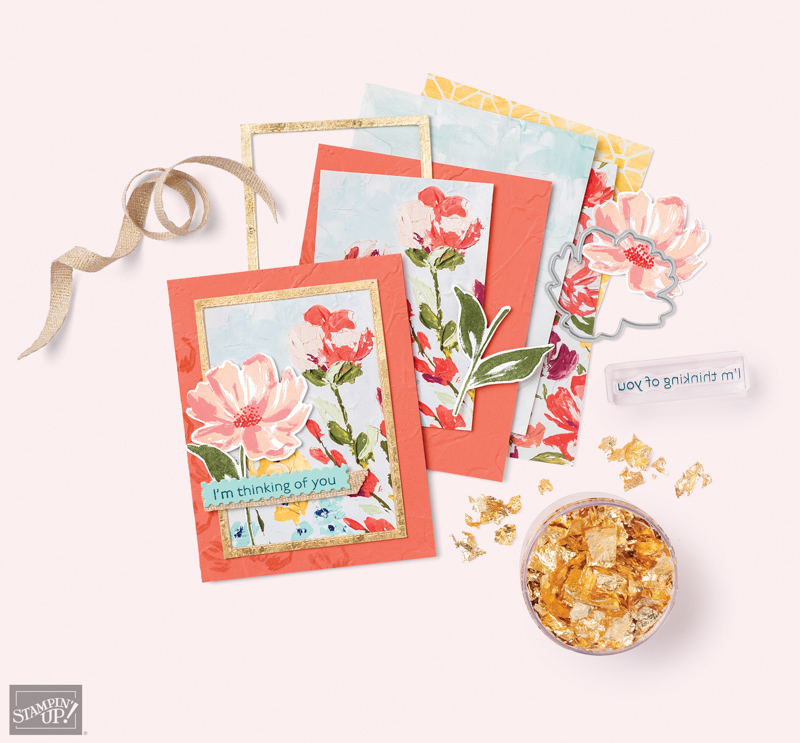
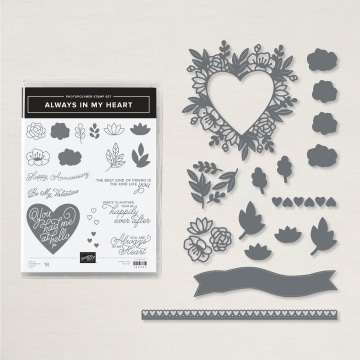
·         Stamp Sets –Blossoms in Bloom (152684)

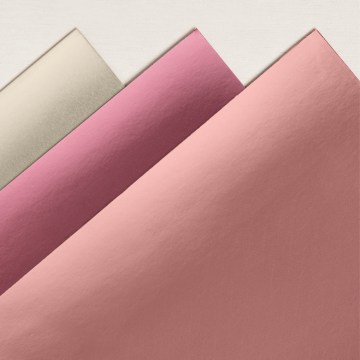
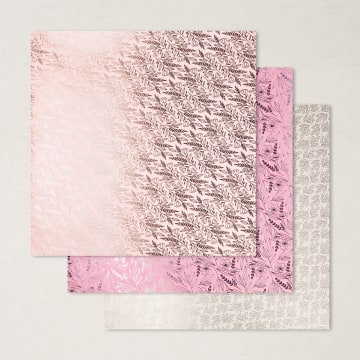
·         Card Stock – Rich Razzleberry (119981); Basic White (159228)

·         Stamp Pads – Rich Razzleberry (147091); Calypso Coral (147101); Crushed Curry (147087); Old Olive (147090)

·         Misc. – Many Layered Blossoms Dies (153582); Dimensionals (104430); Water Painter (151298)


Measurements:  

·         Rich Razzleberry:    8 1/2” x 5 1/2” (21cm x 14.8cm)                  3/4” x 9 1/2” (2cm x 24cm)

·         Basic White:              2 pieces each 5 1/2” x 4 1/4” (14.8cm x 10.5cm)

5 1/4” x 4” (13.8cm x 9.5cm) for inside of card

Scrap for sentiment


Instructions:

·         Score the large Rich Razzleberry piece at 2 1/8” (5.25cm) on the long side. Fold the short piece in. Fold the other end of the card to meet the folded in piece.

·         Take one of the larger pieces of white and die cut the thin outline blossoms die.

·         Take the other large piece of white and stamp the large blossoms image with Rich Razzleberry ink. Line up the die cut over the stamped image to work out where to stamp some leaves and smaller blossoms. Remove the die cut and stamp the leaves with Old Olive ink and the smaller blossoms with Calypso Coral ink. Stamp the centres of the large blossoms with the ‘dotty’ image and Crushed Curry ink. Stamp the centres of the small blossoms with the single dot image and Rich Razzleberry ink.

·         Use a Water Painter with Old Olive ink to colour the more solid leaves on the die cut. Attach the die cut over the stamped images.

·         Use a Water Painter to splatter Rich Razzleberry ink over the stamped panel.

·         Cut 1/4” (1cm) from the stamped panel so that it measures 4” x 5 1/2” (9.5cm x 14.8cm).

·         Cut the panel in half so each piece is 2” x 5 1/4” (4.75cm x 14.8cm).

·         Attach the cut panels to each side of the card front.

·         Stamp images on the smaller white piece and attach to the inside of the card. Stamp envelope to match.

·         Stamp sentiment on scrap white with Rich Razzleberry ink.

·         Wrap the thin piece of Rich Razzleberry around the closed card to create a belly band. Add adhesive so that the band easily slides. Attach the sentiment to the centre of the band with Dimensionals.


Thanks BUNCHES for stopping by today!

Have a WONDERFUL day!

Need to place an order? 

 Click HERE to shop now!  

Are you are interested in saving on your purchases?  
Become a Stampin' Up Demonstrator?  

Click HERE to join my team!

Here's this month's HOSTESS CODE!


Use this months hostess code to receive this months gift from me
when you place an order of $50 or more (before tax & shipping).


If your order is over $150.00 please DO NOT use the hostess code...it is still a qualifying order but you will get the hostess credit for yourself!

You'll also earn Darla Daisies through my loyalty program!

One daisy for every $50 spent (before tax & shipping)!

When you have 10 Darla Daisies you can choose $40.00 worth of  Stampin' Up! product(s) of your choice from me! Get your tracking form at the top this blog by clicking on Darla Daisy Loyalty Program.  When you have 10 daisies, email me your tracking form and your choice of product!!


~Today's Thought~


Wednesday, April 7, 2021

Fine Art Floral

The Annual Catalog Inspiration

Fine Art Floral Suite

Let your inner artist loose with fun stamping techniques! The Fine Art Floral suite is the perfect combination of whimsical watercolor floral and glamorous gold accents. You will love all the ways you can use the Gilded Leafing Embellishments to create a unique effect much different from gold heat embossing or gold foil sheets.

This card combines stamping on Designer Series Paper with the Gilded Leafing Embellishment to create a colorful card with rich texture and a touch of gold glam.

--------------------------------------------------

Gilded Fine Art Floral Card

Gilded Fine Art Floral Card

Join my Email Newsletter List and receive my tutorials by email. With each mailing you will receive a picture of the finished project, a supply list, card layout, and a step-by-step tutorial.

SUPPLIES:


STAMPS: BUNDLES
Art Gallery Bundle (#156227)
Art Gallery stamp set (#154421)
Floral Gallery dies (#154316)

PAPER
Merry Merlot (#146979), Basic White (#159276), Fine Art Floral Designer Series Paper (#154558)

INK
VersaMark (#102283, Merry Merlot (#147112)

ADHESIVES
Stampin' SEAL (#152813), Foam Adhesive Sheets (#152815), Stampin' Dimensionals (#104430), Mini Glue Dots (#103683)

TOOLS
Wild Rose Dies (#149547), Heat Tool (#129053), Take Your Pick Tool (#144107)

EMBELLISHMENTS
Artistry Blooms Adhesive-Backed Sequins (#152477), Gilded Leafing (#154560), 3/8" (1 Cm) Fine Art Ribbon (#154561), Heat & Stick Powder (#156110)

TIPS: The Gilded Leafing is packed tightly in the container and is super light so it can "float" around easily. Open the container carefully and consider storing the leafing in a larger storage container with a lid. This makes the leafing easier to use and also easier to return excess leafing once done.

Coordinating Products


January-June Mini Catalog - Fine Art Floral Suite


January-June Mini Catalog - Fine Art Floral Suite


January-June Mini Catalog - Fine Art Floral Suite


January-June Mini Catalog - Fine Art Floral Suite


Fine Art Floral Suite

VIEW THE SUITE ONLINE

DOWNLOAD OUR LATEST CATALOG

Fine Art Floral Suite
Thanks BUNCHES for stopping by today!
Have a WONDERFUL day!

Need to place an order? 

 Click HERE to shop now!  

Are you are interested in saving on your purchases?  
Become a Stampin' Up Demonstrator?  

Click HERE to join my team!

Here's this month's HOSTESS CODE!


Use this months hostess code to receive this months gift from me
when you place an order of $50 or more (before tax & shipping).


If your order is over $150.00 please DO NOT use the hostess code...it is still a qualifying order but you will get the hostess credit for yourself!

You'll also earn Darla Daisies through my loyalty program!

One daisy for every $50 spent (before tax & shipping)!

When you have 10 Darla Daisies you can choose $40.00 worth of  Stampin' Up! product(s) of your choice from me! Get your tracking form at the top this blog by clicking on Darla Daisy Loyalty Program.  When you have 10 daisies, email me your tracking form and your choice of product!!


~Today's Thought~


Monday, April 5, 2021

"Make-It Monday" - Springtime Joy

Hello everyone!  Did you have a wonderful Easter?  We had three of our children home, beautiful weather and delicious food as we celebrated Resurrection Sunday.  I was thrilled!

It's Monday, so I have a "Make-It Monday" Tutorial for you!  It's such sweet, spring card!  I hope you'll give it a try!

SPRINGTIME JOY

All images © Stampin’ Up!®


Supplies:

·         Stamp Sets -  Springtime Joy (#152886)

·         Card Stock - Pool Party  (#122924), Basic White (#159276)

·         Designer Series Paper - 6x6 Subtles (#153072)

·         Stamp Pads -  Memento Black Ink (#132708); Versamark (#102283)

·         Tools – Heat Tool (#129053)

·         Dies – Tasteful Labels (#152886); Layering circles (#151770)

·         Accessories – Basic Jewel Rhinestones (#144220)

·         Stampin’ Blends – Pool Party (#154894); Petal Pink (#154893); Seafoam (#154902); Smokey Slate (#154904); Color Lifter (#144608)

·         Misc. – Stampin’ Emboss Powder, White (#109132)

·         Adhesives – Stampin’ Dimensionals (#104430); Mini Stampin’ Dimensionals (#104108), Stampin’ Seal (#152813)


Measurements:  

·         Pool Party Cardstock                                                  8 ½” x 5 ½” (score 8.5” side at 4 ¼”)

·         Basic White Cardstock                                              3 ¾” x 5”

·         Basic White Cardstock (for circle die)                         3 ¼” x 3 ¼”

·         Pear Pizzazz Cardstock (for banner die)                    2 ½” x 1”

·         Pool Party DSP                                                               3 5/8” x 4 7/8”

·         Petal Pink DSP                                                               3 5/8” x 7/8”


Instructions:

1.    Fold and burnish the Pool Party Cardstock on the score line (this is your card base).

2.    Using Stampin’ Dimensionals attach the Basic White Cardstock to your card base.

3.    Attach the Pool Party DSP to the top of the Basic White Cardstock using Stampin’ Seal.

4.    With Stampin’ Seal attach the Petal Pink DSP strip on top of the Pool Party DSP at the left edge of the Basic White Cardstock.

5.    Using the 3” circle die from the Layering Circles Die and cut the 3 ¼” square of Basic White Cardstock. 

6.    Using Memento black ink, stamp the lamb, tulip and butterfly images from the Springtime Joy stamp set on the Basic White Cardstock circle.

7.    Color these images with the coordinating Stampin’ Blends.  I colored the lamb with the Basic Gray Blends and used the Color Lifter to lighten it up.

8.    Attach this in the center of the card to the left side using Stampin’ Seal.

9.    Cut the Pear Pizzazz Cardstock piece with the banner die from the Tasteful Labels Dies.

10. Stamp the words from the Springtime Joy stamp set, using Versamark ink, onto the Pear Pizzazz banner.  Sprinkle it with White Stampin’ Emboss Powder and heat with the Heat Tool.

11. Attach the banner to the card front at the bottom right edge of the circle using Mini Stampin’ Dimensionals.

12. Sprinkle some Basic Jewel Rhinestones on.


Thanks BUNCHES for stopping by today!
Have a FANTASTIC day and a wonderful week ahead!!

Need to place an order? 

 Click HERE to shop now!  

Are you are interested in saving on your purchases?  
Become a Stampin' Up Demonstrator?  

Click HERE to join my team!

Here's this month's HOSTESS CODE!


Use this months hostess code to receive this months gift from me
when you place an order of $50 or more (before tax & shipping).


If your order is over $150.00 please DO NOT use the hostess code...it is still a qualifying order but you will get the hostess credit for yourself!

You'll also earn Darla Daisies through my loyalty program!

One daisy for every $50 spent (before tax & shipping)!

When you have 10 Darla Daisies you can choose $40.00 worth of  Stampin' Up! product(s) of your choice from me! Get your tracking form at the top this blog by clicking on Darla Daisy Loyalty Program.  When you have 10 daisies, email me your tracking form and your choice of product!!


~Today's Thought~


Friday, April 2, 2021

Love You Always

The Annual Catalog Inspiration

Love You Always Suite

Love is always in season and the Love You Always suite is always in style. Of course it's perfect for when you are sharing a Valentine with your sweetheart, creating treats for the kids but it's also great for sending wedding or anniversary well wishes.

This tutorial creates an beautifully detailed card perfect for an anniversary. The subtle details of pattern, shimmer, and texture combine to make a special card that you need to create and see in person to truly appreciate!

--------------------------------------------------

Always in My Heart Card

Always in My Heart Card

Join my Email Newsletter List and receive my tutorials by email. With each mailing you will receive a picture of the finished project, a supply list, card layout, and a step-by-step tutorial.

SUPPLIES:


BUNDLE
Always in My Heart Bundle (#156194)
Always In My Heart Photopolymer stamp set (#154337)
Floral Hearts Dies (#154306)

PAPER
Old Olive (#100702), Basic White (#159276), Pool Party (#122924), Granny Apple Green (#146990), Vellum Cardstock (#101856), Pearlescent Specialty Paper (#154291), Fine Art Floral Designer Series Paper (#154558)

INK
Poppy Parade (#147050), Calypso Coral (#147101), Petal Pink (#147108), Pretty Peacock (#150083), Bumblebee (#153116)

TOOLS
Floral Heart Dies (#154306)

ADHESIVES
Stampin’ Dimensionals (#104430 ), Stampin' SEAL (#152813), Mini Glue Dots (#103683)

EMBELLISHMENTS
Gold Glitter Enamel Dots (#152155), Pool Party 3/8" (1 Cm) Sheer Ribbon (#152462)

TIP: When adding Vellum Cardstock to projects, place adhesive where it will be covered by other layers of cardstock, ribbon, or embellishments, so that you don't see the adhesive through the translucent vellum paper.

Coordinating Products

January-June Mini Catalog - Love You Always SuiteJanuary-June Mini Catalog - Love You Always Suite


Love You Always Suite

VIEW THE SUITE ONLINE
Thanks BUNCHES for stopping by!
Have a FANTASTIC day and a wonderful weekend!

Need to place an order? 

 Click HERE to shop now!  

Are you are interested in saving on your purchases?  
Become a Stampin' Up Demonstrator?  

Click HERE to join my team!

Here's this month's HOSTESS CODE!


Use this months hostess code to receive this months gift from me
when you place an order of $50 or more (before tax & shipping).


If your order is over $150.00 please DO NOT use the hostess code...it is still a qualifying order but you will get the hostess credit for yourself!

You'll also earn Darla Daisies through my loyalty program!

One daisy for every $50 spent (before tax & shipping)!

When you have 10 Darla Daisies you can choose $40.00 worth of  Stampin' Up! product(s) of your choice from me! Get your tracking form at the top this blog by clicking on Darla Daisy Loyalty Program.  When you have 10 daisies, email me your tracking form and your choice of product!!

~Today's Thought~


DOWNLOAD OUR LATEST CATALOG

Love You Always Suite

Thursday, April 1, 2021

Whale Done

Good Morning everyone!   Happy April Fools Day!!!  Have you played any good pranks today?  I haven't played one!  I'm so tired I can't think!  I stayed up late last night to place my PRE-ORDER from the NEW CATALOG then got up early to go to the gym!  I'm too old for this!!  

Here's a fun card create with the Whale Done Bundle!


Thanks BUNCHES for stopping by!
Have a FANTASTIC day!

Need to place an order? 

 Click HERE to shop now!  

Are you are interested in saving on your purchases?  
Become a Stampin' Up Demonstrator?  

Click HERE to join my team!

Here's this month's HOSTESS CODE!


Use this months hostess code to receive this months gift from me
when you place an order of $50 or more (before tax & shipping).


If your order is over $150.00 please DO NOT use the hostess code...it is still a qualifying order but you will get the hostess credit for yourself!

You'll also earn Darla Daisies through my loyalty program!

One daisy for every $50 spent (before tax & shipping)!

When you have 10 Darla Daisies you can choose $40.00 worth of  Stampin' Up! product(s) of your choice from me! Get your tracking form at the top this blog by clicking on Darla Daisy Loyalty Program.  When you have 10 daisies, email me your tracking form and your choice of product!!


~Today's Thought~


Mojo Monday - Impressions Abloom Tutorials

Hello everyone!  Thanks for stopping by and HAPPY Monday!  How's your creative mojo today?  I've got so pretty inspiration for you.....